Destroy Infrastructure using Juniper Apstra Terraform Provider
Destroy Infrastructure using Juniper Apstra Terraform Provider
So far, You have created and updated an IPv4 pool in Juniper Apstra with Terraform. In this tutorial, you will use Terraform to destroy this infrastructure.
Once you no longer need infrastructure, you may want to destroy it to reduce your security exposure and costs. For example, you may remove a production environment from service, or manage short-lived environments like build or testing systems. In addition to building and modifying infrastructure, Terraform can destroy or recreate the infrastructure it manages.
Destroy
The terraform destroy command terminates resources managed by your Terraform project. This command is the inverse of terraform apply in that it terminates all the resources specified in your Terraform state. It does not destroy resources running elsewhere that are not managed by the current Terraform project.
Destroy the resources you created.
pradeep@juniper apstra-terraform-3 % terraform destroy
apstra_ipv4_pool.example: Refreshing state... [id=72f6ff51-9062-47ae-9b1d-05eb36835888]

Terraform used the selected providers to generate the following execution plan. Resource actions are indicated with the following symbols:
  - destroy

Terraform will perform the following actions:

  # apstra_ipv4_pool.example will be destroyed
  - resource "apstra_ipv4_pool" "example" {
      - id              = "72f6ff51-9062-47ae-9b1d-05eb36835888" -> null
      - name            = "RFC1918 Subnets" -> null
      - status          = "not_in_use" -> null
      - subnets         = [
          - {
              - network         = "10.0.0.0/8" -> null
              - status          = "pool_element_available" -> null
              - total           = 16777216 -> null
              - used            = 0 -> null
              - used_percentage = 0 -> null
            },
          - {
              - network         = "172.16.0.0/12" -> null
              - status          = "pool_element_available" -> null
              - total           = 1048576 -> null
              - used            = 0 -> null
              - used_percentage = 0 -> null
            },
          - {
              - network         = "192.168.0.0/16" -> null
              - status          = "pool_element_available" -> null
              - total           = 65536 -> null
              - used            = 0 -> null
              - used_percentage = 0 -> null
            },
        ] -> null
      - total           = 17891328 -> null
      - used            = 0 -> null
      - used_percentage = 0 -> null
    }

Plan: 0 to add, 0 to change, 1 to destroy.

Changes to Outputs:
  - example_pool_size = "pool 'RFC1918 Subnets' is sized for 17891328 addresses" -> null

Do you really want to destroy all resources?
  Terraform will destroy all your managed infrastructure, as shown above.
  There is no undo. Only 'yes' will be accepted to confirm.

  Enter a value: yes

apstra_ipv4_pool.example: Destroying... [id=72f6ff51-9062-47ae-9b1d-05eb36835888]
apstra_ipv4_pool.example: Destruction complete after 1s

Destroy complete! Resources: 1 destroyed.
pradeep@juniper apstra-terraform-3 %
The - prefix indicates that the instance will be destroyed. As with apply, Terraform shows its execution plan and waits for approval before making any changes.
Just like with apply, Terraform determines the order to destroy your resources. In this case, Terraform identified a single resource with no other dependencies, so it destroyed the ipv4 pool. In more complicated cases with multiple resources, Terraform will destroy them in a suitable order to respect dependencies.
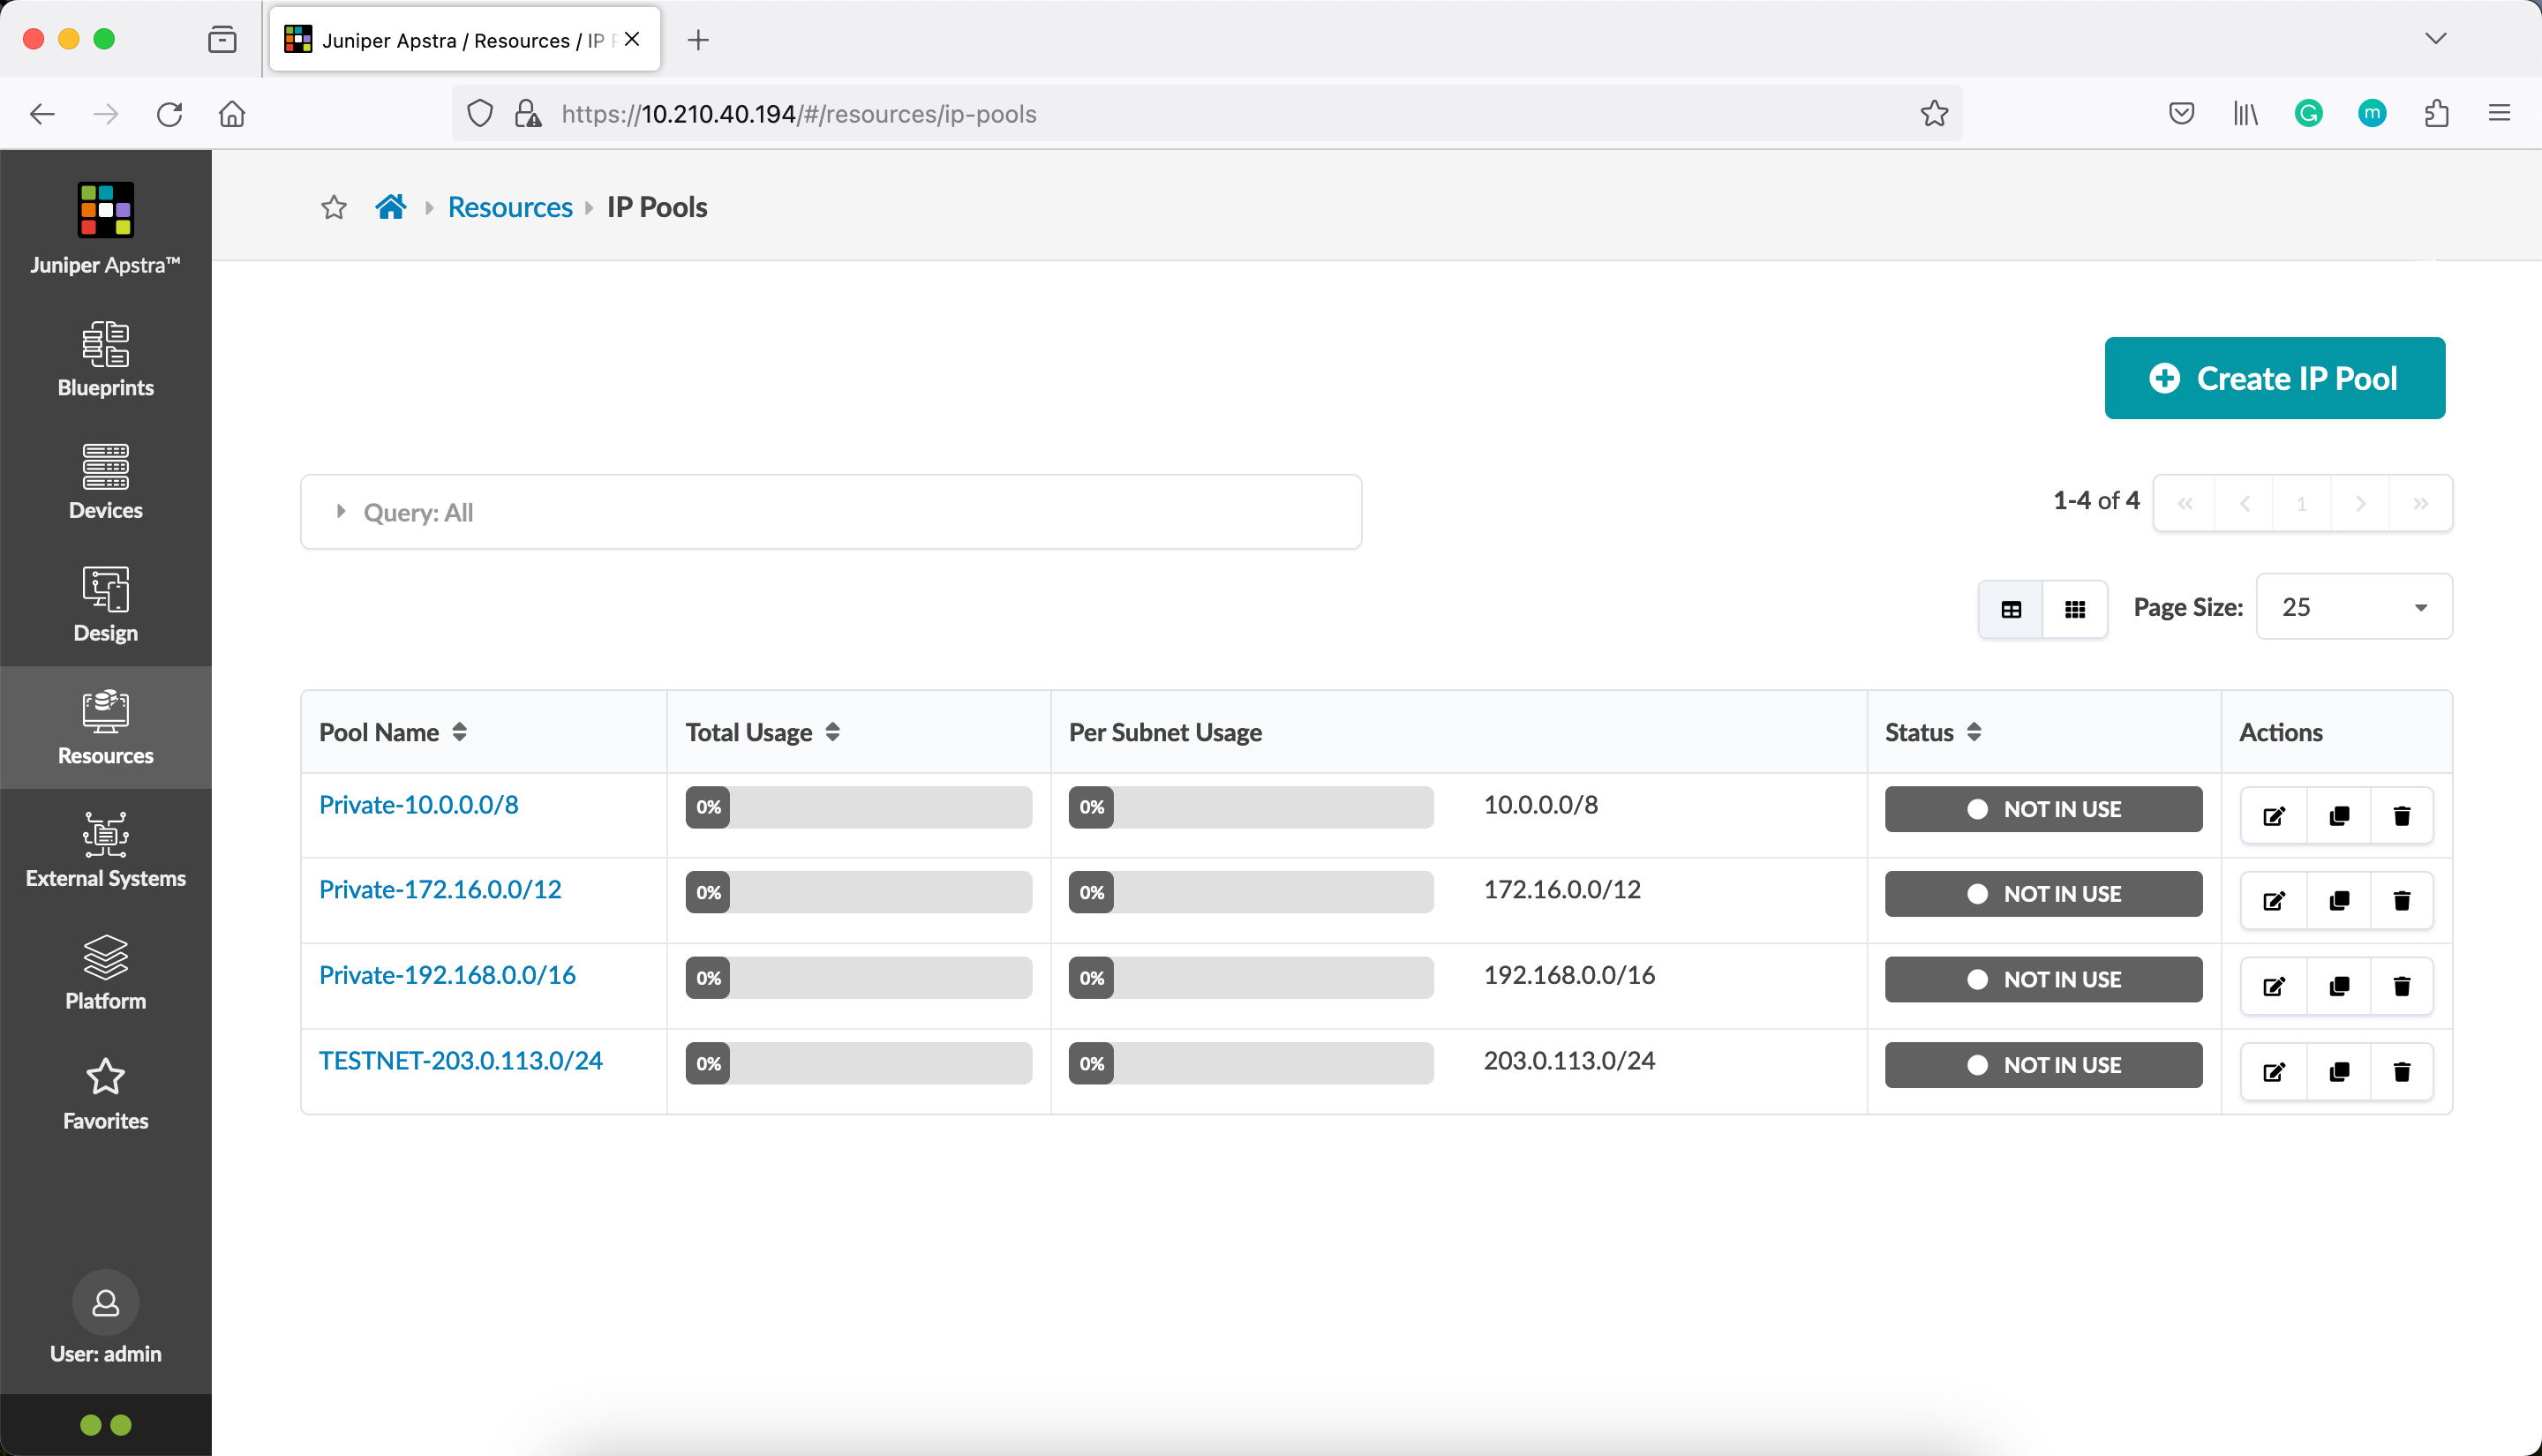
Go to Juniper Apstra Web UI and verify that the RFC1918 Subnets IPv4 pool is no longer present.

See that Terraform did not destroy the other pools which are not managed by Terraform, those are the Apstra pre-defined pools (outside the scope of Terraform, at this point).
Terraform State after Destroy
First, check the present working directory.
pradeep@juniper apstra-terraform-3 % ls
main.tf                  terraform.tfstate        terraform.tfstate.backup
pradeep@juniper apstra-terraform-3 %
Verify the terrafrom state.
pradeep@juniper apstra-terraform-3 % terraform show
The state file is empty. No resources are represented.
pradeep@juniper apstra-terraform-3 %
pradeep@juniper apstra-terraform-3 % cat terraform.tfstate
{
  "version": 4,
  "terraform_version": "1.6.3",
  "serial": 8,
  "lineage": "2af2414c-391b-7b25-10cc-9bf34810ca14",
  "outputs": {},
  "resources": [],
  "check_results": null
}
pradeep@juniper apstra-terraform-3 %
There is a backup file automatically created by Terraform. Though the current state file is empty, let’s check what’s there in the backup.
pradeep@juniper apstra-terraform-3 % cat terraform.tfstate.backup
{
  "version": 4,
  "terraform_version": "1.6.3",
  "serial": 6,
  "lineage": "2af2414c-391b-7b25-10cc-9bf34810ca14",
  "outputs": {
    "example_pool_size": {
      "value": "pool 'RFC1918 Subnets' is sized for 17891328 addresses",
      "type": "string"
    }
  },
  "resources": [
    {
      "mode": "managed",
      "type": "apstra_ipv4_pool",
      "name": "example",
      "provider": "provider[\"registry.terraform.io/juniper/apstra\"]",
      "instances": [
        {
          "schema_version": 0,
          "attributes": {
            "id": "72f6ff51-9062-47ae-9b1d-05eb36835888",
            "name": "RFC1918 Subnets",
            "status": "not_in_use",
            "subnets": [
              {
                "network": "10.0.0.0/8",
                "status": "pool_element_available",
                "total": 16777216,
                "used": 0,
                "used_percentage": 0
              },
              {
                "network": "172.16.0.0/12",
                "status": "pool_element_available",
                "total": 1048576,
                "used": 0,
                "used_percentage": 0
              },
              {
                "network": "192.168.0.0/16",
                "status": "pool_element_available",
                "total": 65536,
                "used": 0,
                "used_percentage": 0
              }
            ],
            "total": 17891328,
            "used": 0,
            "used_percentage": 0
          },
          "sensitive_attributes": []
        }
      ]
    }
  ],
  "check_results": null
}
pradeep@juniper apstra-terraform-3 %
So far, you have built, changed, and destroyed infrastructure from your local machine. This is great for testing and development, but in production environments you should keep your state secure and encrypted, where your teammates can access it to collaborate on infrastructure. The best way to do this is by running Terraform in a remote environment with shared access to state. We will cover that in another post.


