
Kubernetes: Using our own Hello-world app from DockerHub
Pushing the Hello-world app to DockerHub
In the previous post on Containerize a Python Application and deploy it in Kubernetes, we have seen how to build a simple app from scratch and create a docker container out of it. But we have kept it to ourselves and used that local image for our Kubernetes Deployment (by using the imagePullPolicy: Never and image: hello-world:latest).
In this post, let us publish our image to DockerHub and use the newly uploaded image in Kubernetes.
For this, we have to login to docker Hub using our own credentials.
Before attempting login, let us check that docker config file in the home directory.
pradeep@learnk8s$ cat ~/.docker/config.json
{"auths":{},"credsStore":"desktop"}%
pradeep@learnk8s$ docker login
Login with your Docker ID to push and pull images from Docker Hub. If you don't have a Docker ID, head over to https://hub.docker.com to create one.
Username: gaddepradeep
Password:
Login Succeeded

Logging in with your password grants your terminal complete access to your account.
For better security, log in with a limited-privilege personal access token. Learn more at https://docs.docker.com/go/access-tokens/
Look at the docker config file and note the changes. During docker login this file gets updated.
pradeep@learnk8s$ cat ~/.docker/config.json
{
	"auths": {
		"https://index.docker.io/v1/": {}
	},
	"credsStore": "desktop"
}

pradeep@learnk8s$
Verify our previously created image.
pradeep@learnk8s$ docker images
REPOSITORY    TAG       IMAGE ID       CREATED        SIZE
hello-world   latest    c7cbee691370   38 hours ago   918MB
Try to push to Docker Hub with the docker push command.
pradeep@learnk8s$ docker push hello-world:latest
The push refers to repository [docker.io/library/hello-world]
e1486a748855: Preparing
cd1ff0d7c1f9: Preparing
5f70bf18a086: Preparing
755bc5819bf5: Preparing
ea02e4889d36: Preparing
c4418e789e70: Waiting
7c12a541abbf: Waiting
6d95196cbe50: Waiting
5bdcc8e2060c: Waiting
08fa02ce37eb: Waiting
a037458de4e0: Waiting
bafdbe68e4ae: Waiting
a13c519c6361: Waiting
denied: requested access to the resource is denied
The push failed because we dont have permission. Look at the URL of the repository that we are trying to push docker.io/library/hello-world.
Our repository name is gaddepradeep so let us try again.
pradeep@learnk8s$ docker push gaddepradeep/hello-world:latest
The push refers to repository [docker.io/gaddepradeep/hello-world]
An image does not exist locally with the tag: gaddepradeep/hello-world
pradeep@learnk8s$
Look at the new repository name: docker.io/gaddepradeep/hello-world.
But still, there is a different error. This time it says, An image does not exist locally with the tag: gaddepradeep/hello-world.
So, let us use docker tag command to re-tag our existing hello-world image.
pradeep@learnk8s$ docker tag hello-world:latest gaddepradeep/hello-world:latest
Verify the available images again.
pradeep@learnk8s$ docker images
REPOSITORY                 TAG       IMAGE ID       CREATED        SIZE
gaddepradeep/hello-world   latest    c7cbee691370   38 hours ago   918MB
hello-world                latest    c7cbee691370   38 hours ago   918MB
pradeep@learnk8s$
We can see two images with the same IMAGE ID of c7cbee691370 and same size but the REPOSITORY name is different for each of them.
Now that tagging is done, attemt to push again.
pradeep@learnk8s$ docker push gaddepradeep/hello-world:latest
The push refers to repository [docker.io/gaddepradeep/hello-world]
e1486a748855: Pushed
cd1ff0d7c1f9: Pushed
5f70bf18a086: Pushed
755bc5819bf5: Pushed
ea02e4889d36: Pushed
c4418e789e70: Pushed
7c12a541abbf: Pushed
6d95196cbe50: Pushed
5bdcc8e2060c: Pushed
08fa02ce37eb: Pushed
a037458de4e0: Pushed
bafdbe68e4ae: Pushed
a13c519c6361: Pushed
latest: digest: sha256:d123b2e8225937522f8fc6dda3c3c70160fe33e0ed0fdc0df8aedf07db076a3c size: 3049
pradeep@learnk8s$
With this we have successfully uploaded our little Python hello-world app into Docker Hub and anyone can use this public image now.
Before start using it, let us go to the Docker Hub portal and check if the image is present or not.
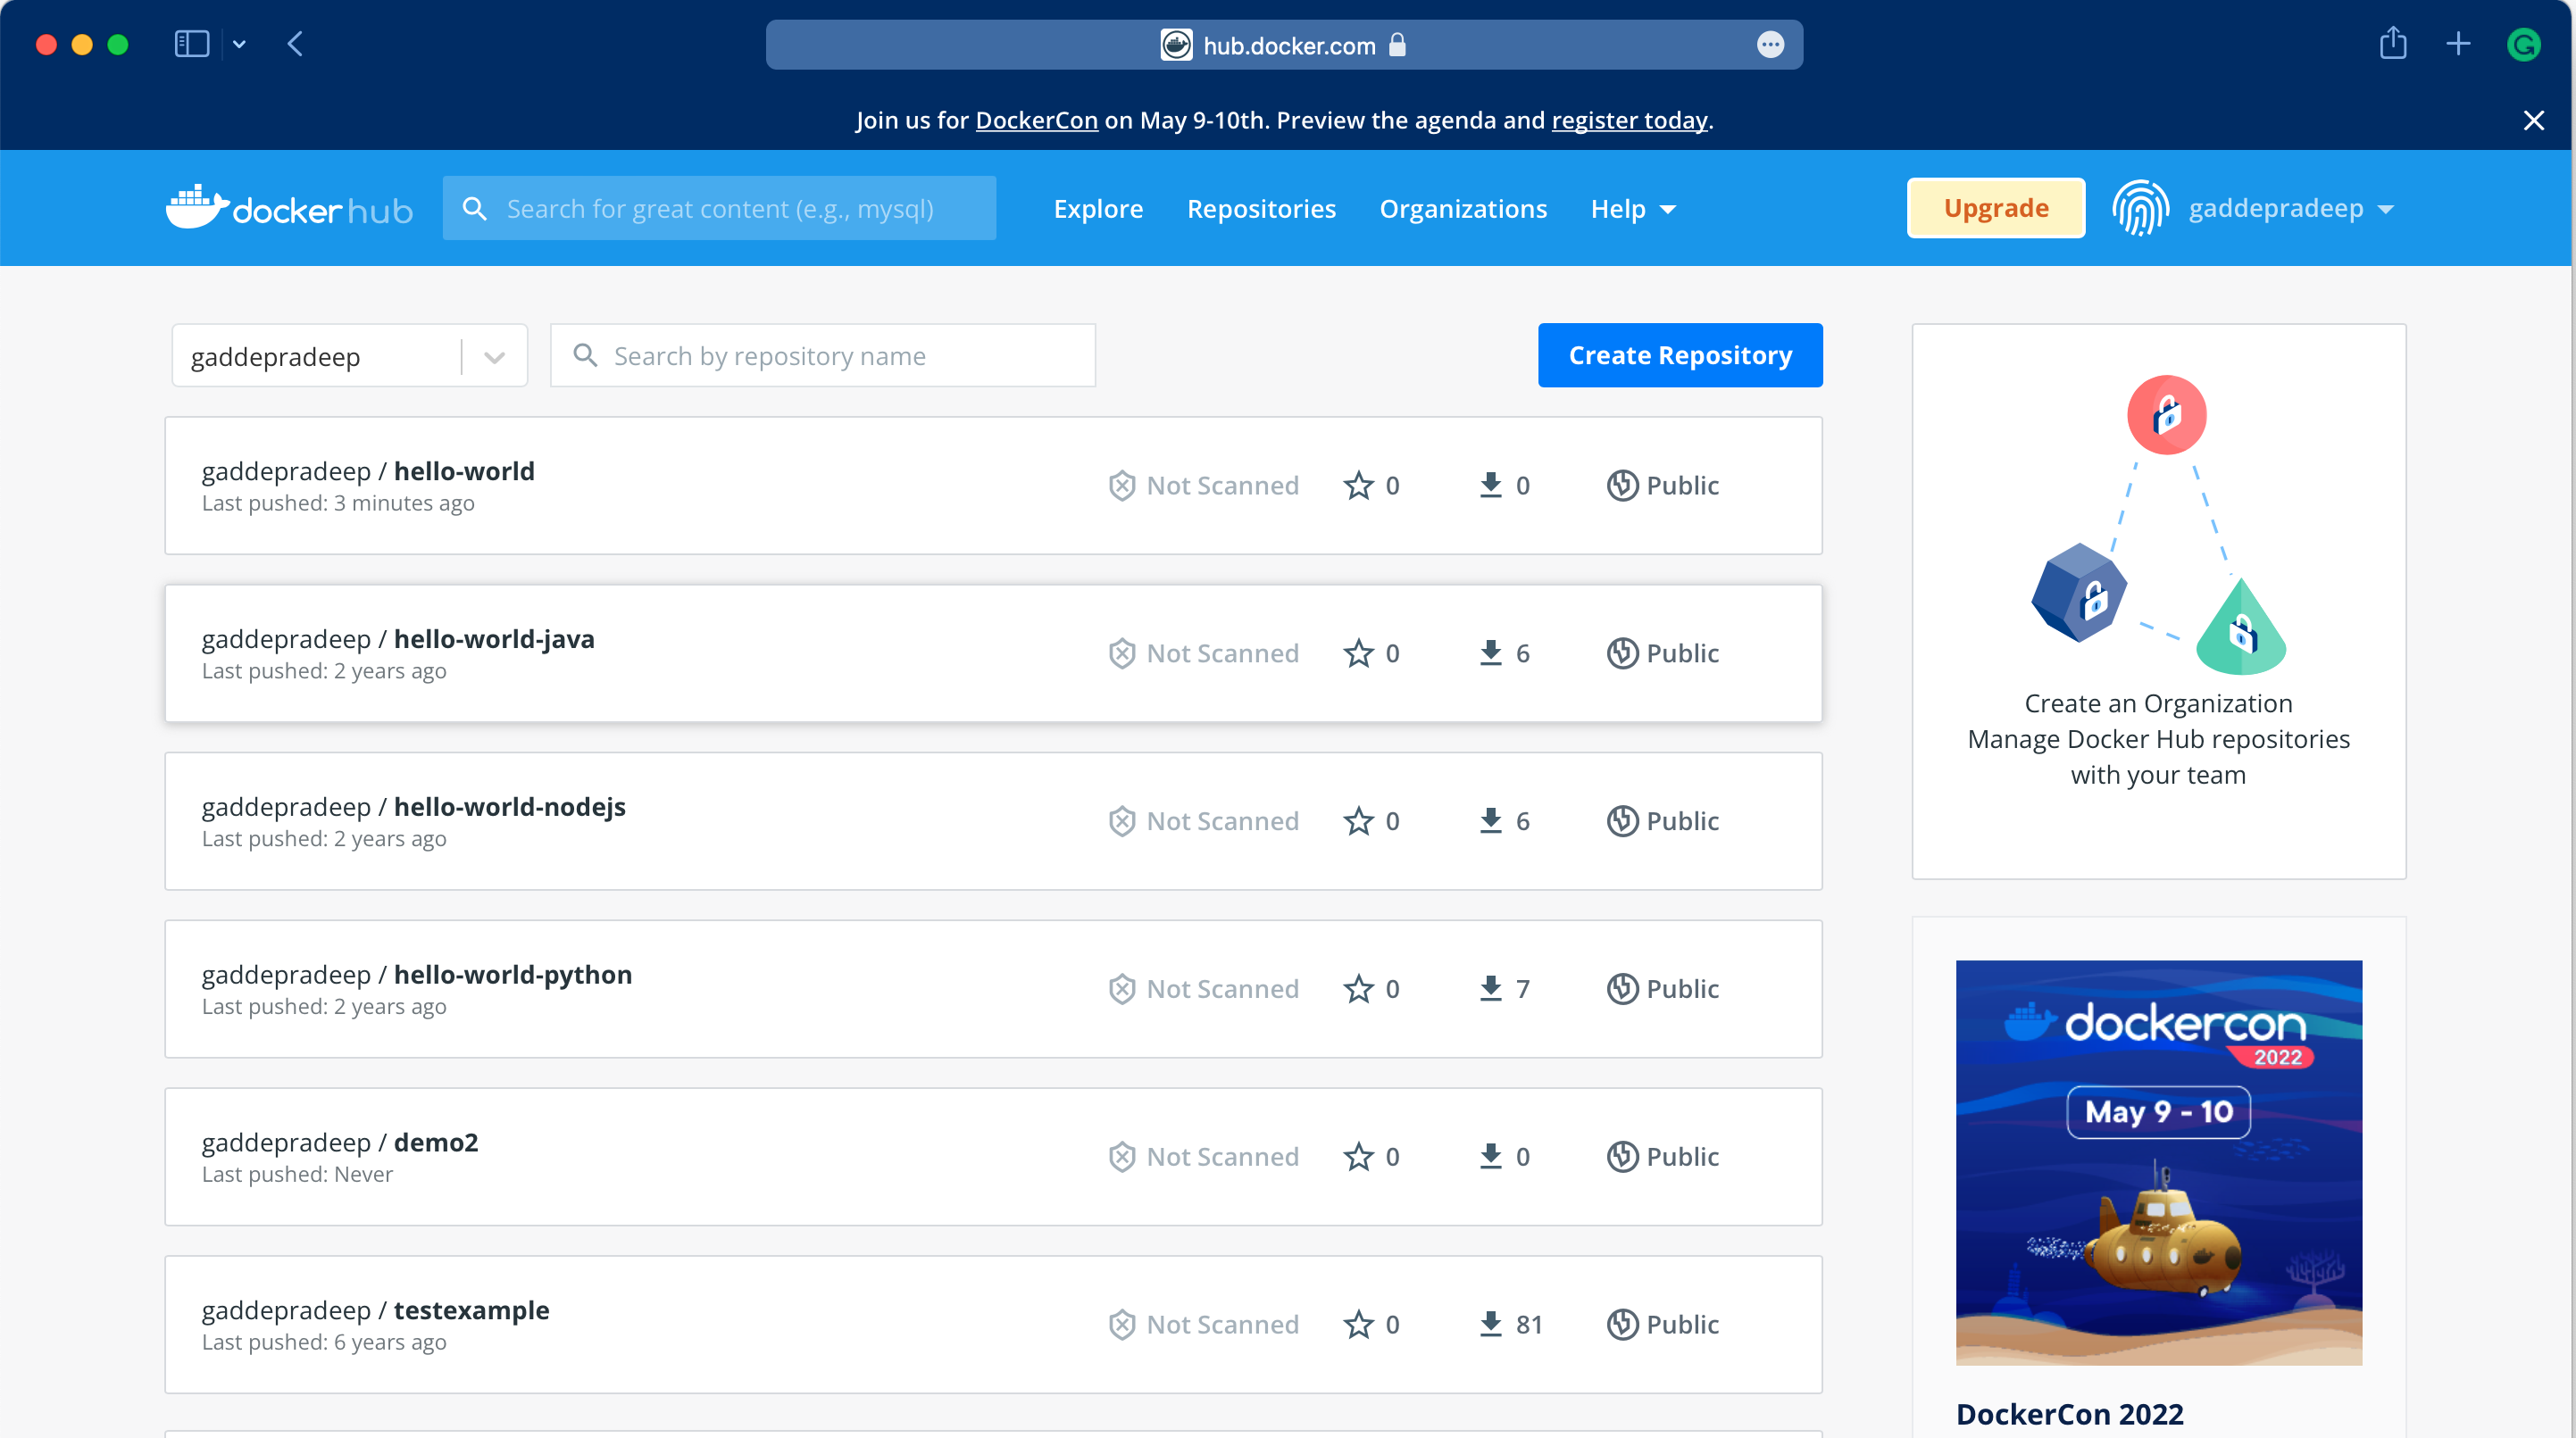
We can see our newly uploaded image (gaddepradeep/hello-world).
Create a new deployment called hello using this new image.
pradeep@learnk8s$ kubectl create deployment hello --image=gaddepradeep/hello-world
deployment.apps/hello created
Verify the deployment and pod status.
pradeep@learnk8s$ kubectl get pods
NAME                     READY   STATUS    RESTARTS   AGE
hello-65b45d9f99-7nfl2   1/1     Running   0          8s
pradeep@learnk8s$ kubectl get pods -o wide
NAME                     READY   STATUS    RESTARTS   AGE   IP           NODE       NOMINATED NODE   READINESS GATES
hello-65b45d9f99-7nfl2   1/1     Running   0          13s   172.17.0.3   minikube   <none>           <none>
pradeep@learnk8s$ kubectl get deploy
NAME    READY   UP-TO-DATE   AVAILABLE   AGE
hello   1/1     1            1           17s
We can see our Deployment is successful and the Pod is running.
We can test our app using the Pod IP, 172.17.0.3 in this case, and we know that our Python Flask application was running on the port 5000.
pradeep@learnk8s$ minikube ssh
                         _             _
            _         _ ( )           ( )
  ___ ___  (_)  ___  (_)| |/')  _   _ | |_      __
/' _ ` _ `\| |/' _ `\| || , <  ( ) ( )| '_`\  /'__`\
| ( ) ( ) || || ( ) || || |\`\ | (_) || |_) )(  ___/
(_) (_) (_)(_)(_) (_)(_)(_) (_)`\___/'(_,__/'`\____)

$ curl 172.17.0.3:5000
Hello World!$
$ exit
logout
pradeep@learnk8s$
Let us expose our deployment as a LoadBalancer,
pradeep@learnk8s$ kubectl expose deployment hello --type=LoadBalancer --port=7000 --target-port=5000 --name=hello
service/hello exposed
pradeep@learnk8s$ kubectl get svc
NAME         TYPE           CLUSTER-IP      EXTERNAL-IP   PORT(S)          AGE
hello        LoadBalancer   10.107.121.32   <pending>     7000:32711/TCP   4s
kubernetes   ClusterIP      10.96.0.1       <none>        443/TCP          6h22m
In our minikube deployment, we have to use minikube tunnel to get an EXTERNAL-IP
pradeep@learnk8s$ minikube tunnel
Password:
Status:
	machine: minikube
	pid: 3237
	route: 10.96.0.0/12 -> 172.16.30.9
	minikube: Running
	services: [hello]
    errors:
		minikube: no errors
		router: no errors
		loadbalancer emulator: no errors
pradeep@learnk8s$ kubectl get svc
NAME         TYPE           CLUSTER-IP      EXTERNAL-IP     PORT(S)          AGE
hello        LoadBalancer   10.107.121.32   10.107.121.32   7000:32711/TCP   4m8s
kubernetes   ClusterIP      10.96.0.1       <none>          443/TCP          6h26m
Our service hello has got an External IP now.
pradeep@learnk8s$ minikube service hello --url
http://172.16.30.9:32711
We can access our App now, using this URL

Ok, it is working fine. Let us describe the Pod to confirm the Image used
pradeep@learnk8s$ kubectl describe pod hello-65b45d9f99-7nfl2 | grep Image
    Image:          gaddepradeep/hello-world
    Image ID:       docker-pullable://gaddepradeep/hello-world@sha256:d123b2e8225937522f8fc6dda3c3c70160fe33e0ed0fdc0df8aedf07db076a3c
This concludes our testing with Docker Hub push and using the newly published image in Kubernetes.

