
Create and deploy Azure Resource Manager templates
It is Day#2 of Microsoft Build Cloud Skills Challenge. In this post, let us learn about creating ARM Template files.
Within your template, you can write template expressions that extend the capabilities of JSON. These expressions make use of the functions provided by Resource Manager.
The template has the following sections: Parameters - Provide values during deployment that allow the same template to be used with different environments. Variables - Define values that are reused in your templates. They can be constructed from parameter values. User-defined functions - Create customized functions that simplify your template. Resources - Specify the resources to deploy. Outputs - Return values from the deployed resources.
With Resource Manager, you can create a template (in JSON format) that defines the infrastructure and configuration of your Azure solution. By using a template, you can repeatedly deploy your solution throughout its lifecycle and have confidence your resources are deployed in a consistent state.
When you deploy a template, Resource Manager converts the template into REST API operations.
You can deploy a template using any of the following options: Azure portal Azure CLI PowerShell REST API Button in GitHub repository Azure Cloud Shell
How you define templates and resource groups is entirely up to you and how you want to manage your solution.
You don’t have to define your entire infrastructure in a single template.
To deploy a particular solution, you create a master template that links all the required templates.
Azure Resource Manager analyzes dependencies to ensure resources are created in the correct order.
After creating your template, you may wish to share it with other users in your organization.
You can use conditional deployment to create a new resource or use an existing one.
When deploying your resources, you specify that the deployment is either an incremental update or a complete update. The difference between these two modes is how Resource Manager handles existing resources in the resource group that aren’t in the template. The default mode is incremental.
In incremental mode, Resource Manager leaves unchanged resources that exist in the resource group but aren’t specified in the template.
In complete mode, Resource Manager deletes resources that exist in the resource group but aren’t specified in the template.
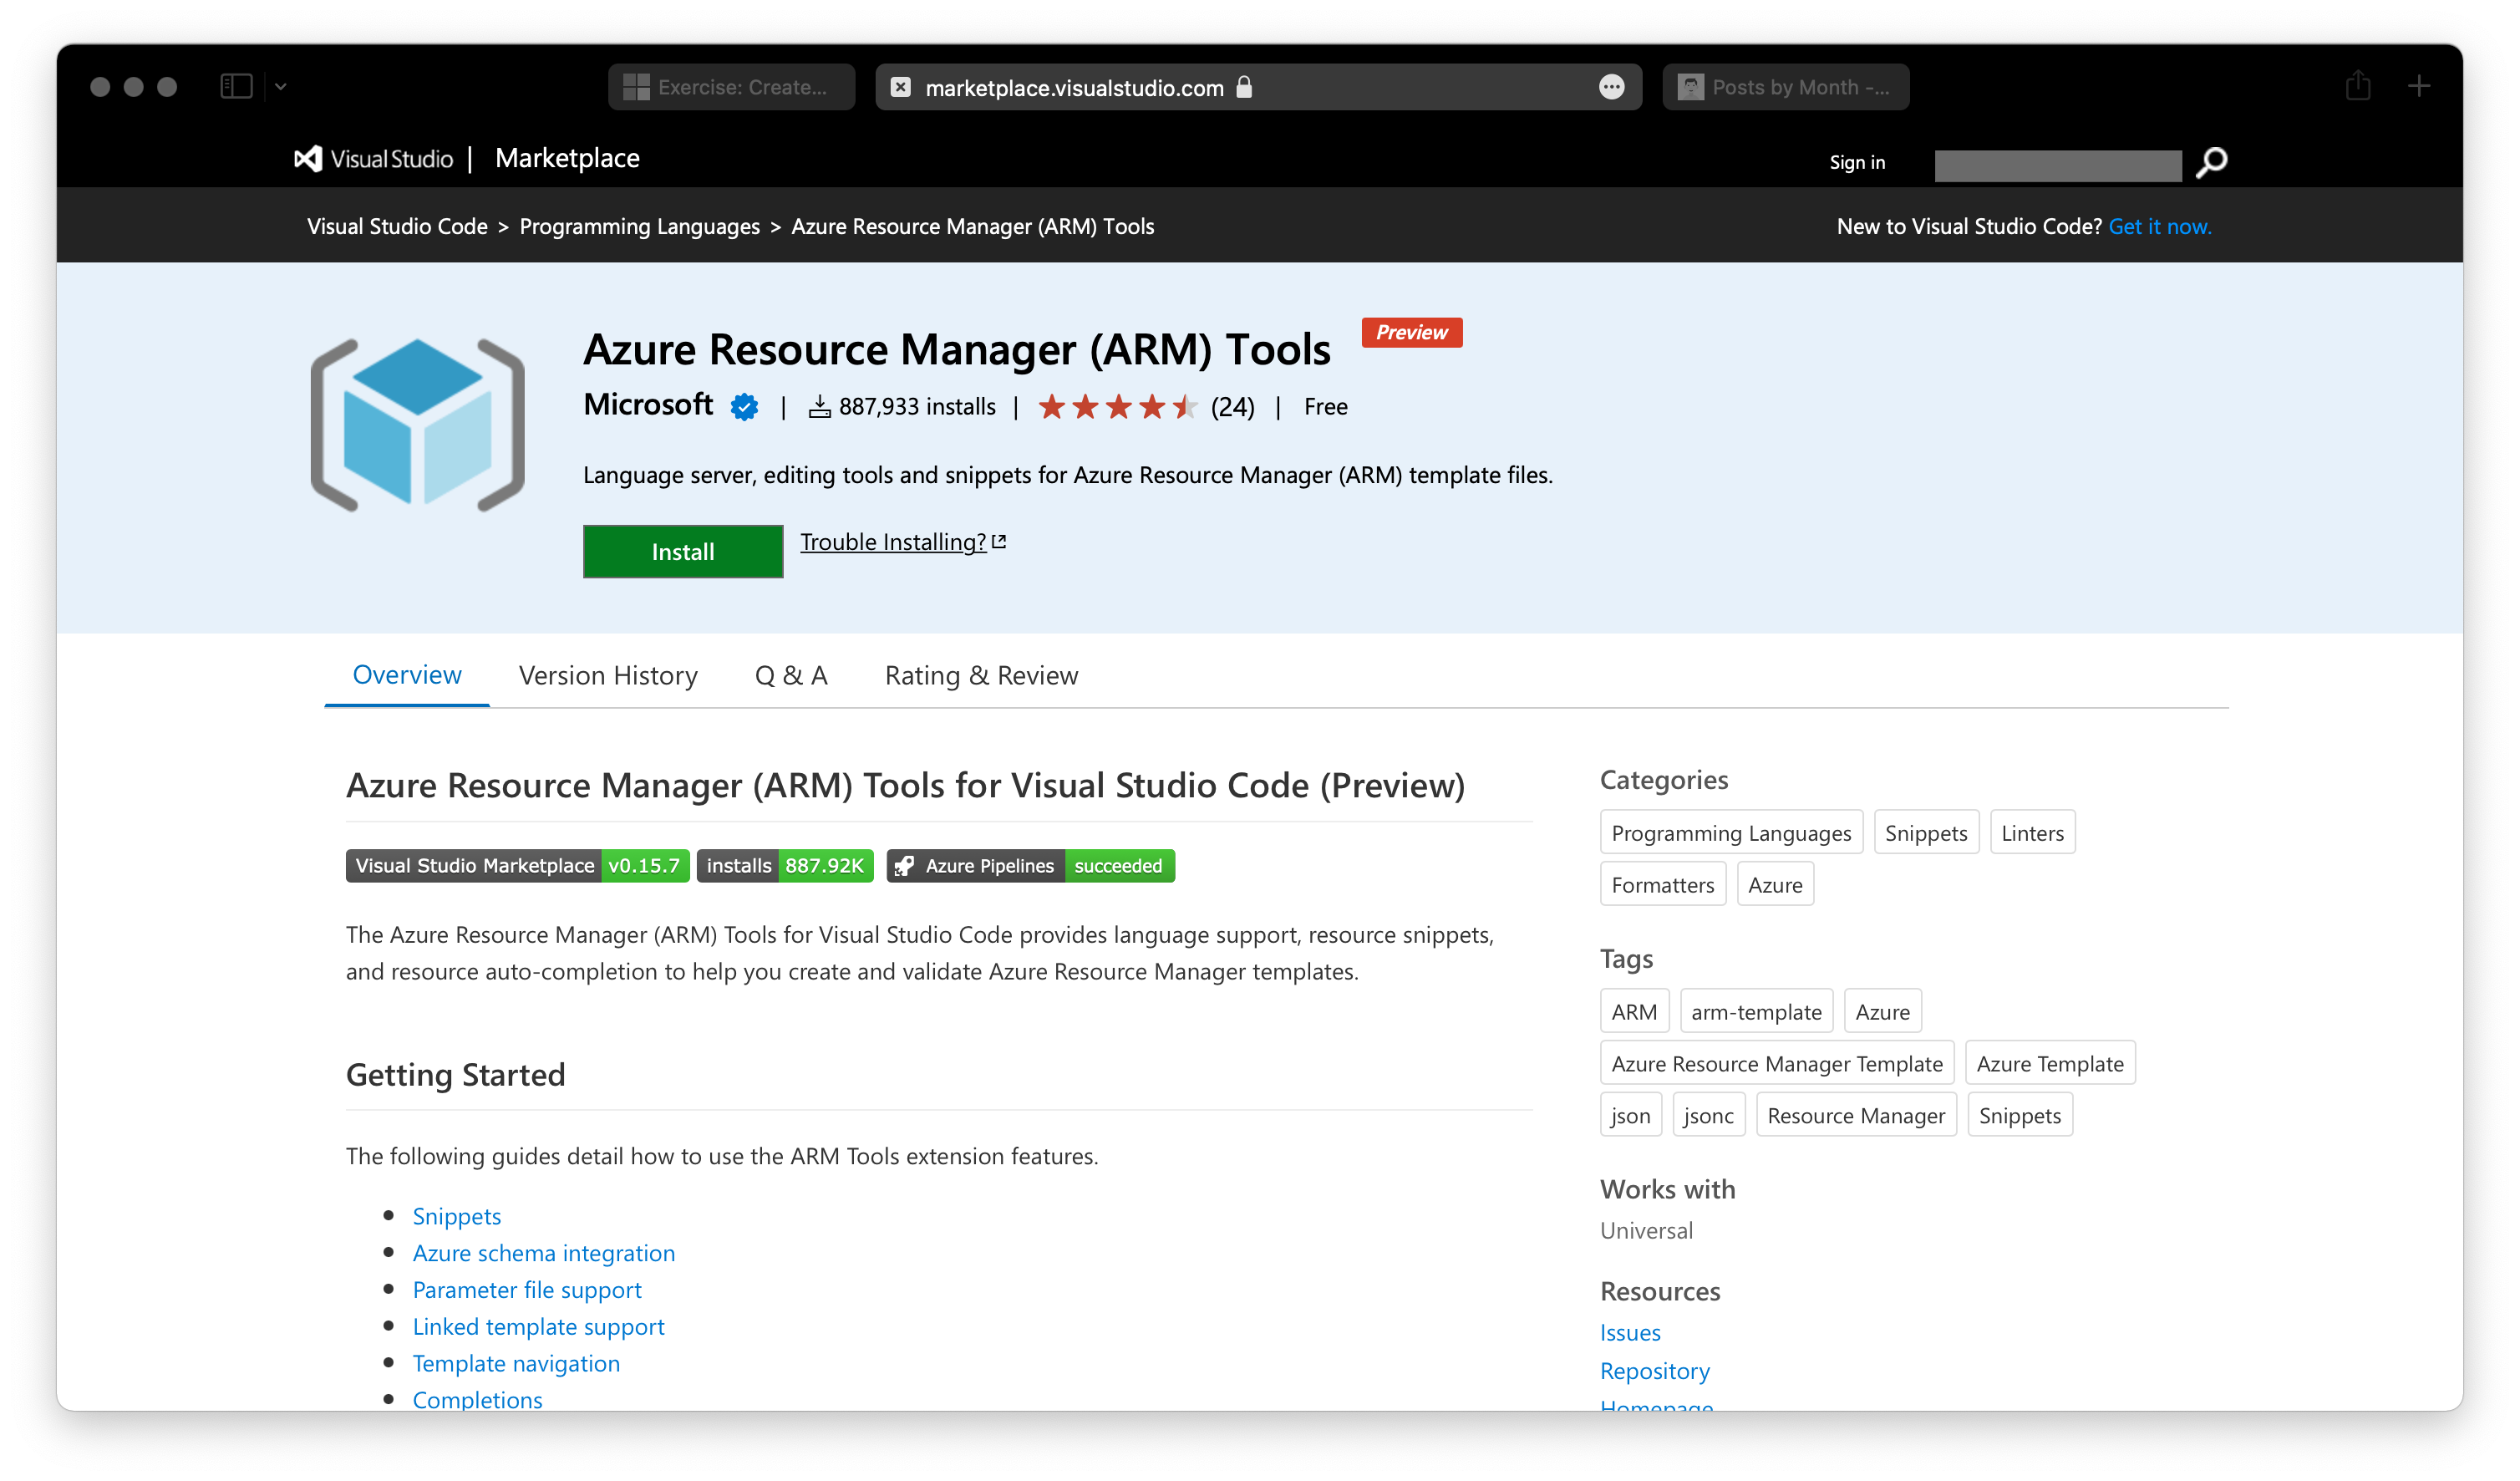
Let us see how to use Visual Studio Code, and the Azure Resource Manager Tools extension, to create and edit Azure Resource Manager templates.
I already have Visual Studio Code but not the Azure Resource Manager Tools installed. So, I installed it now.
Create an Azure Resource Manager template
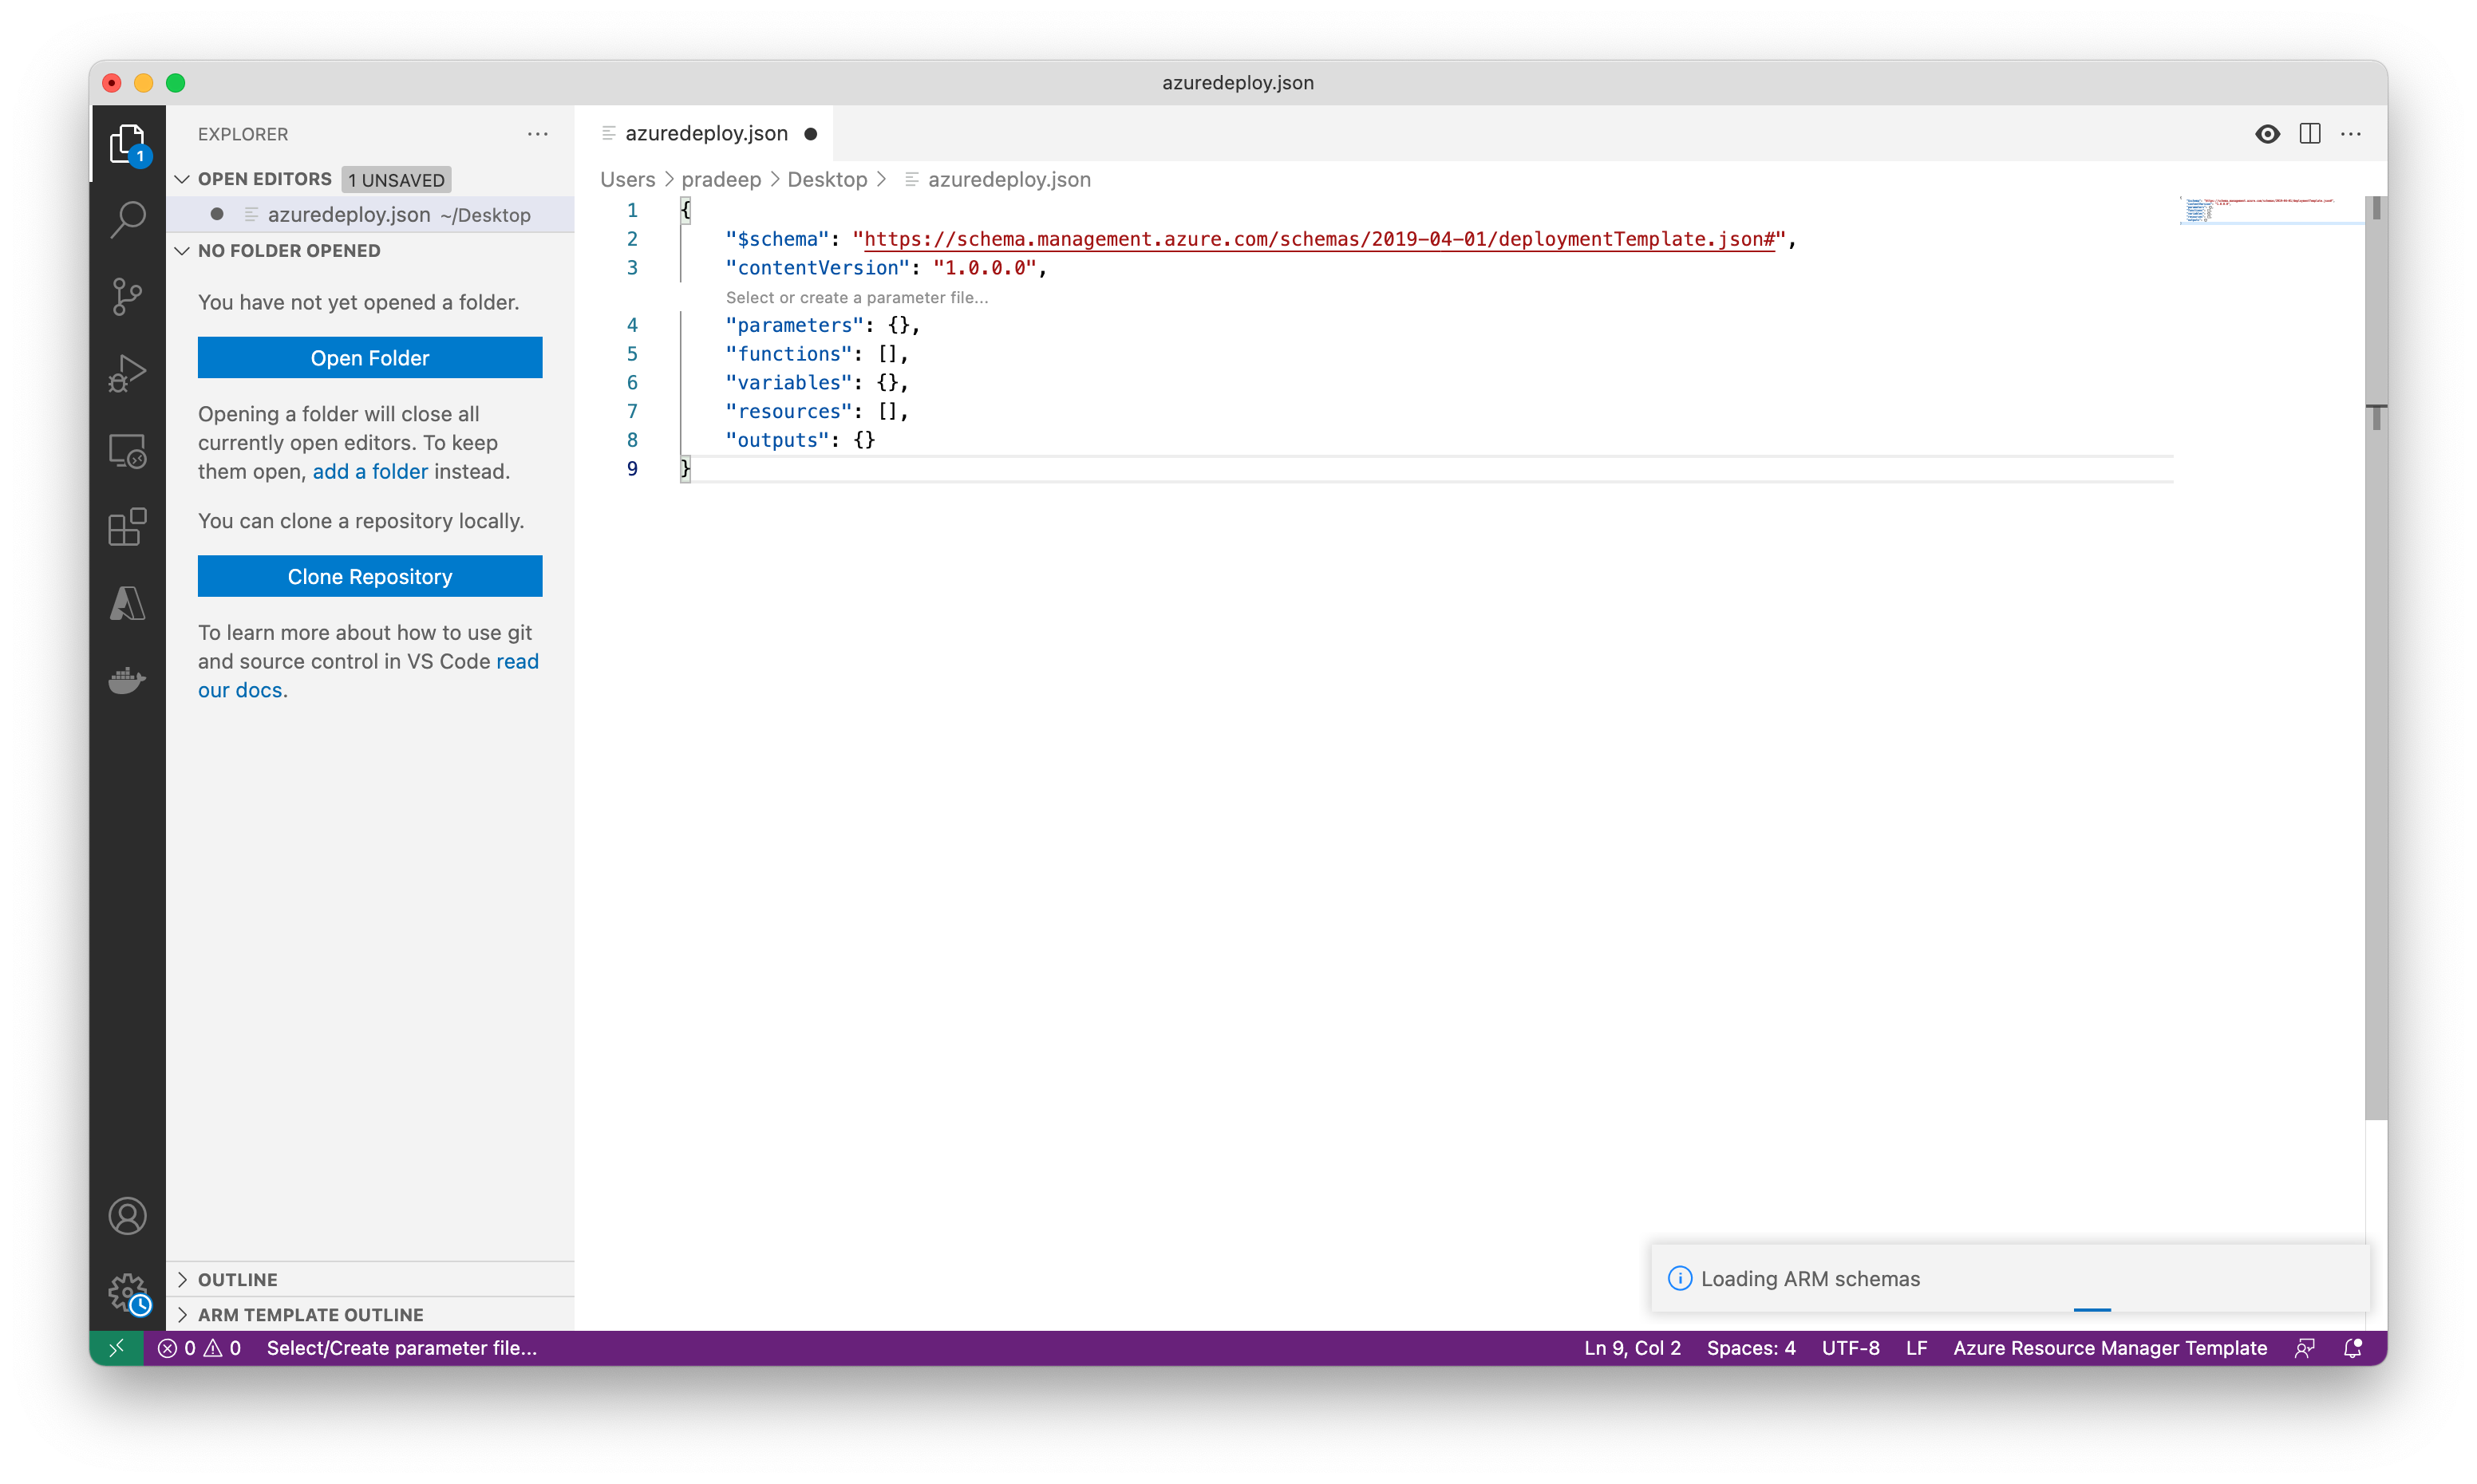
Create and open a new file named azuredeploy.json with Visual Studio Code.
Enter arm in the azuredeploy.json file and select arm! from the autocomplete options. This will insert a snippet with the basic building blocks for an Azure resource group deployment.

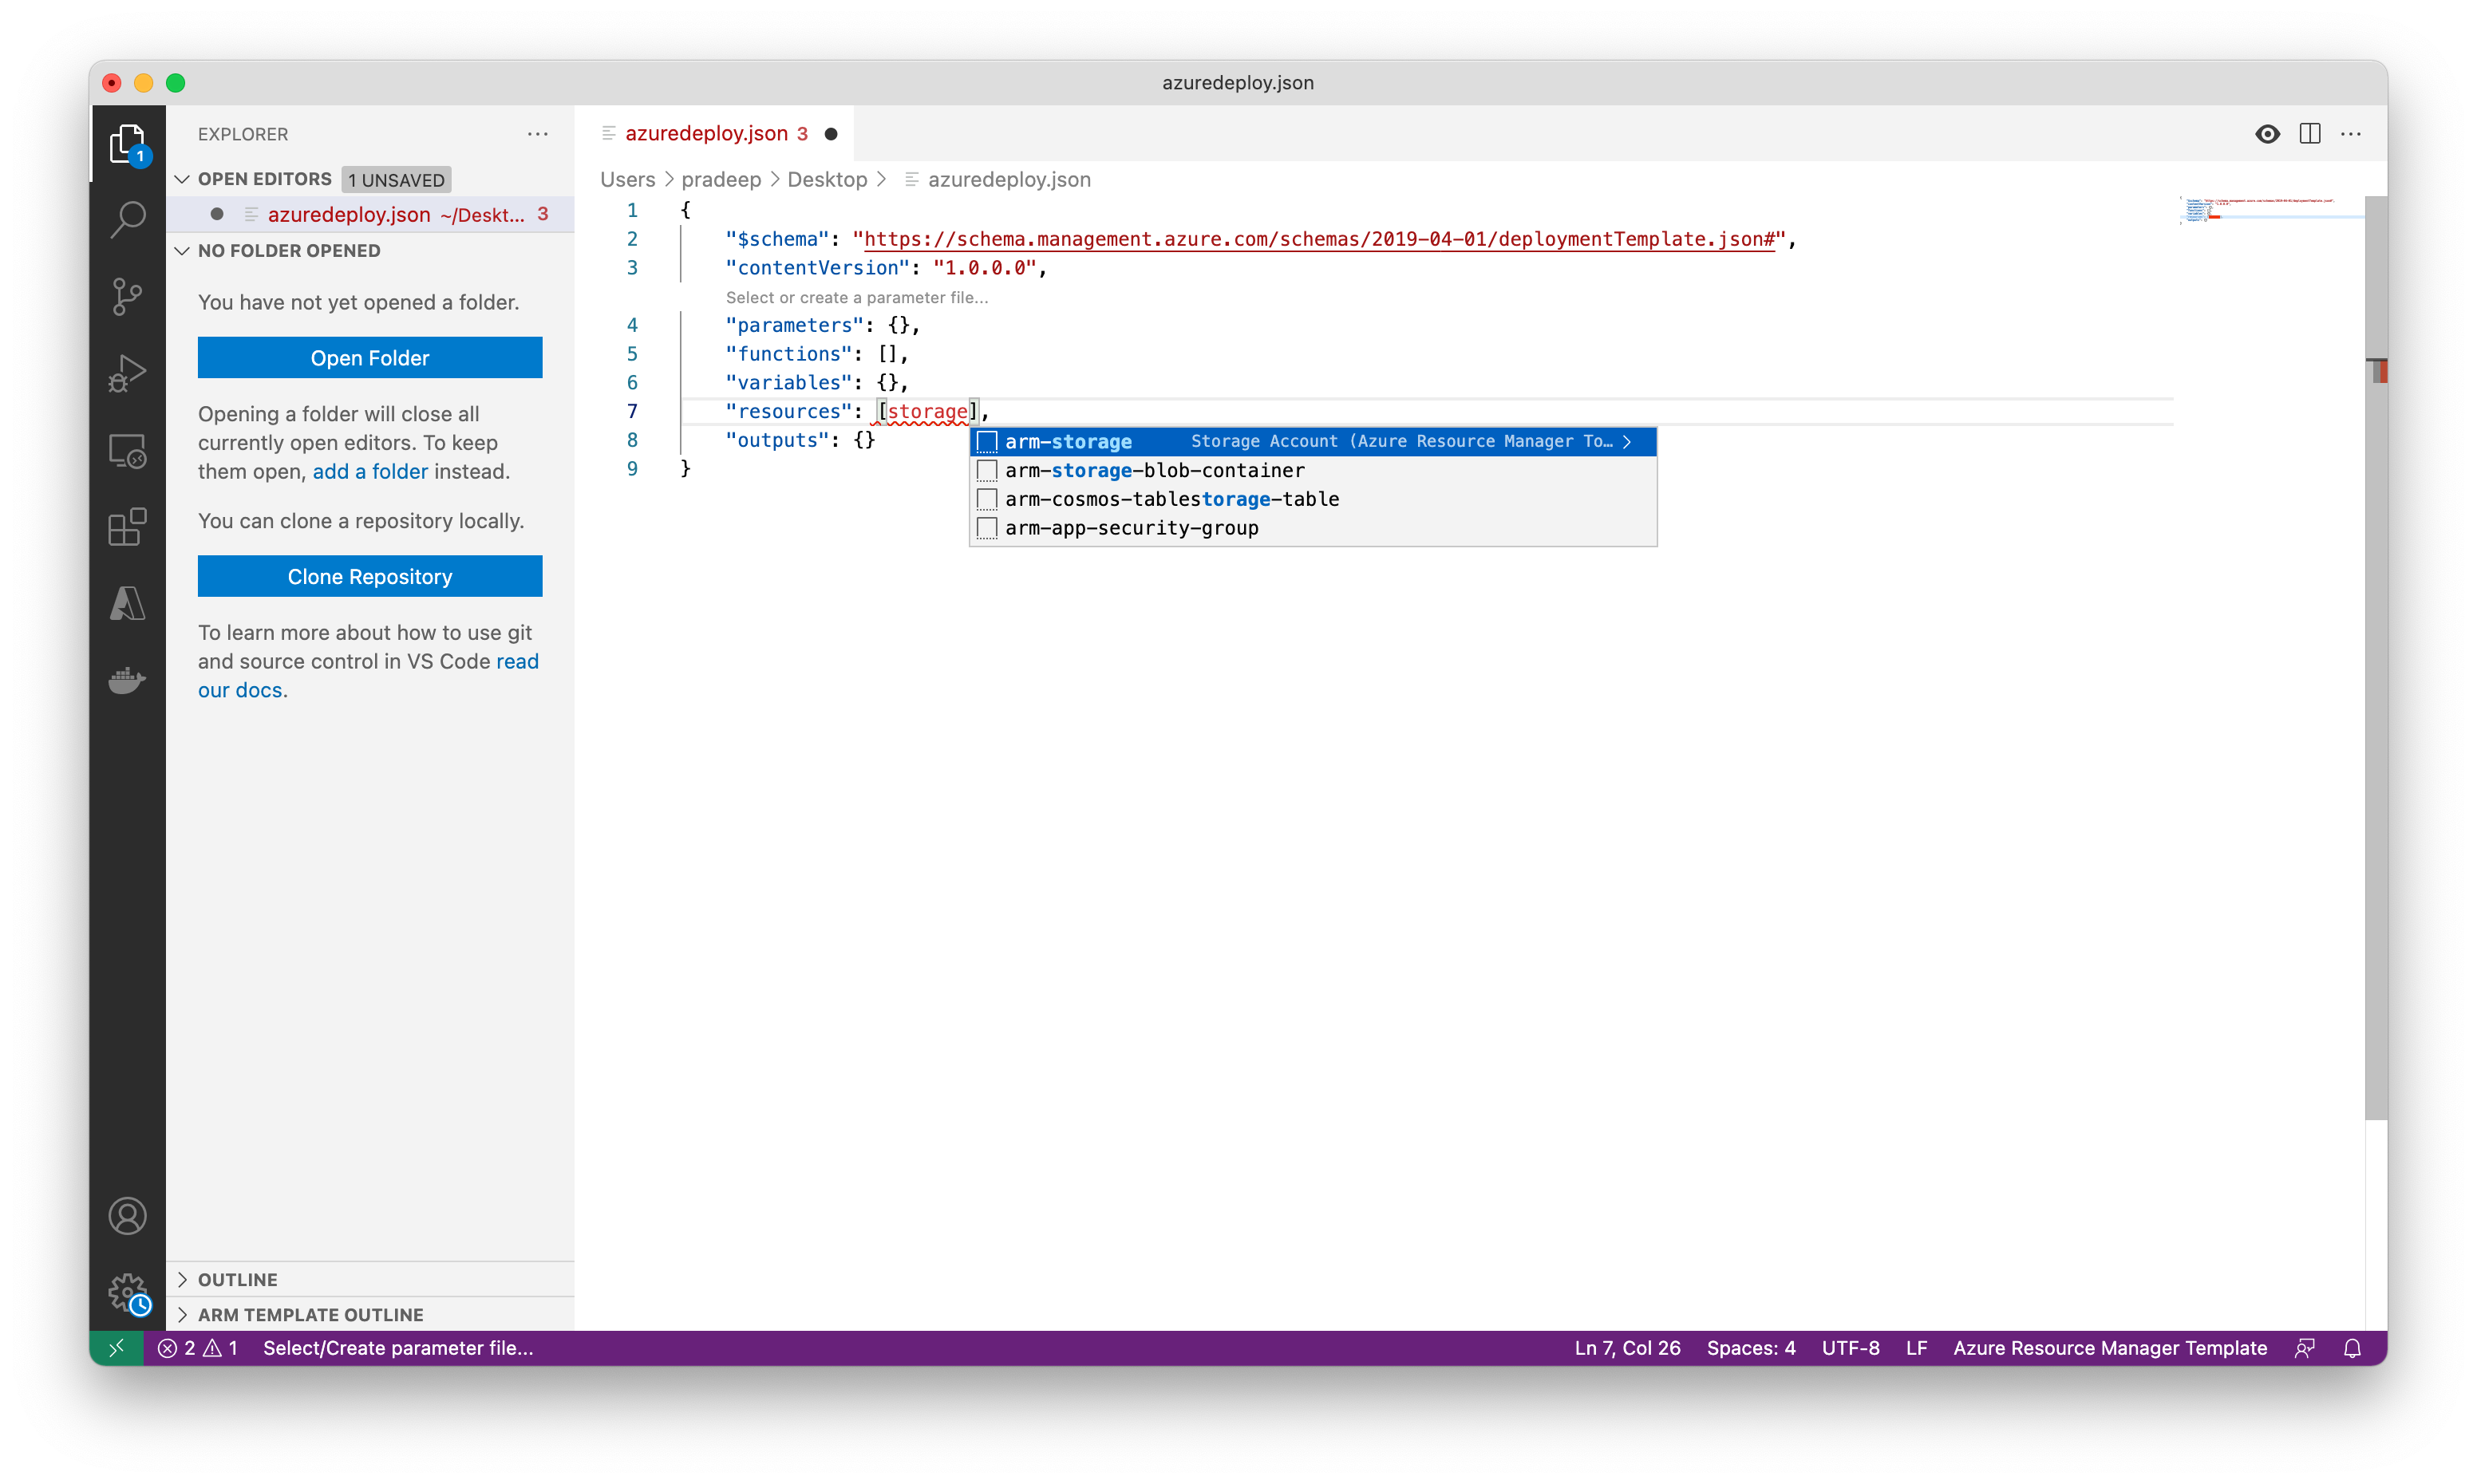
In this section you will add a snippet to support the creation of an Azure storage account to the template.
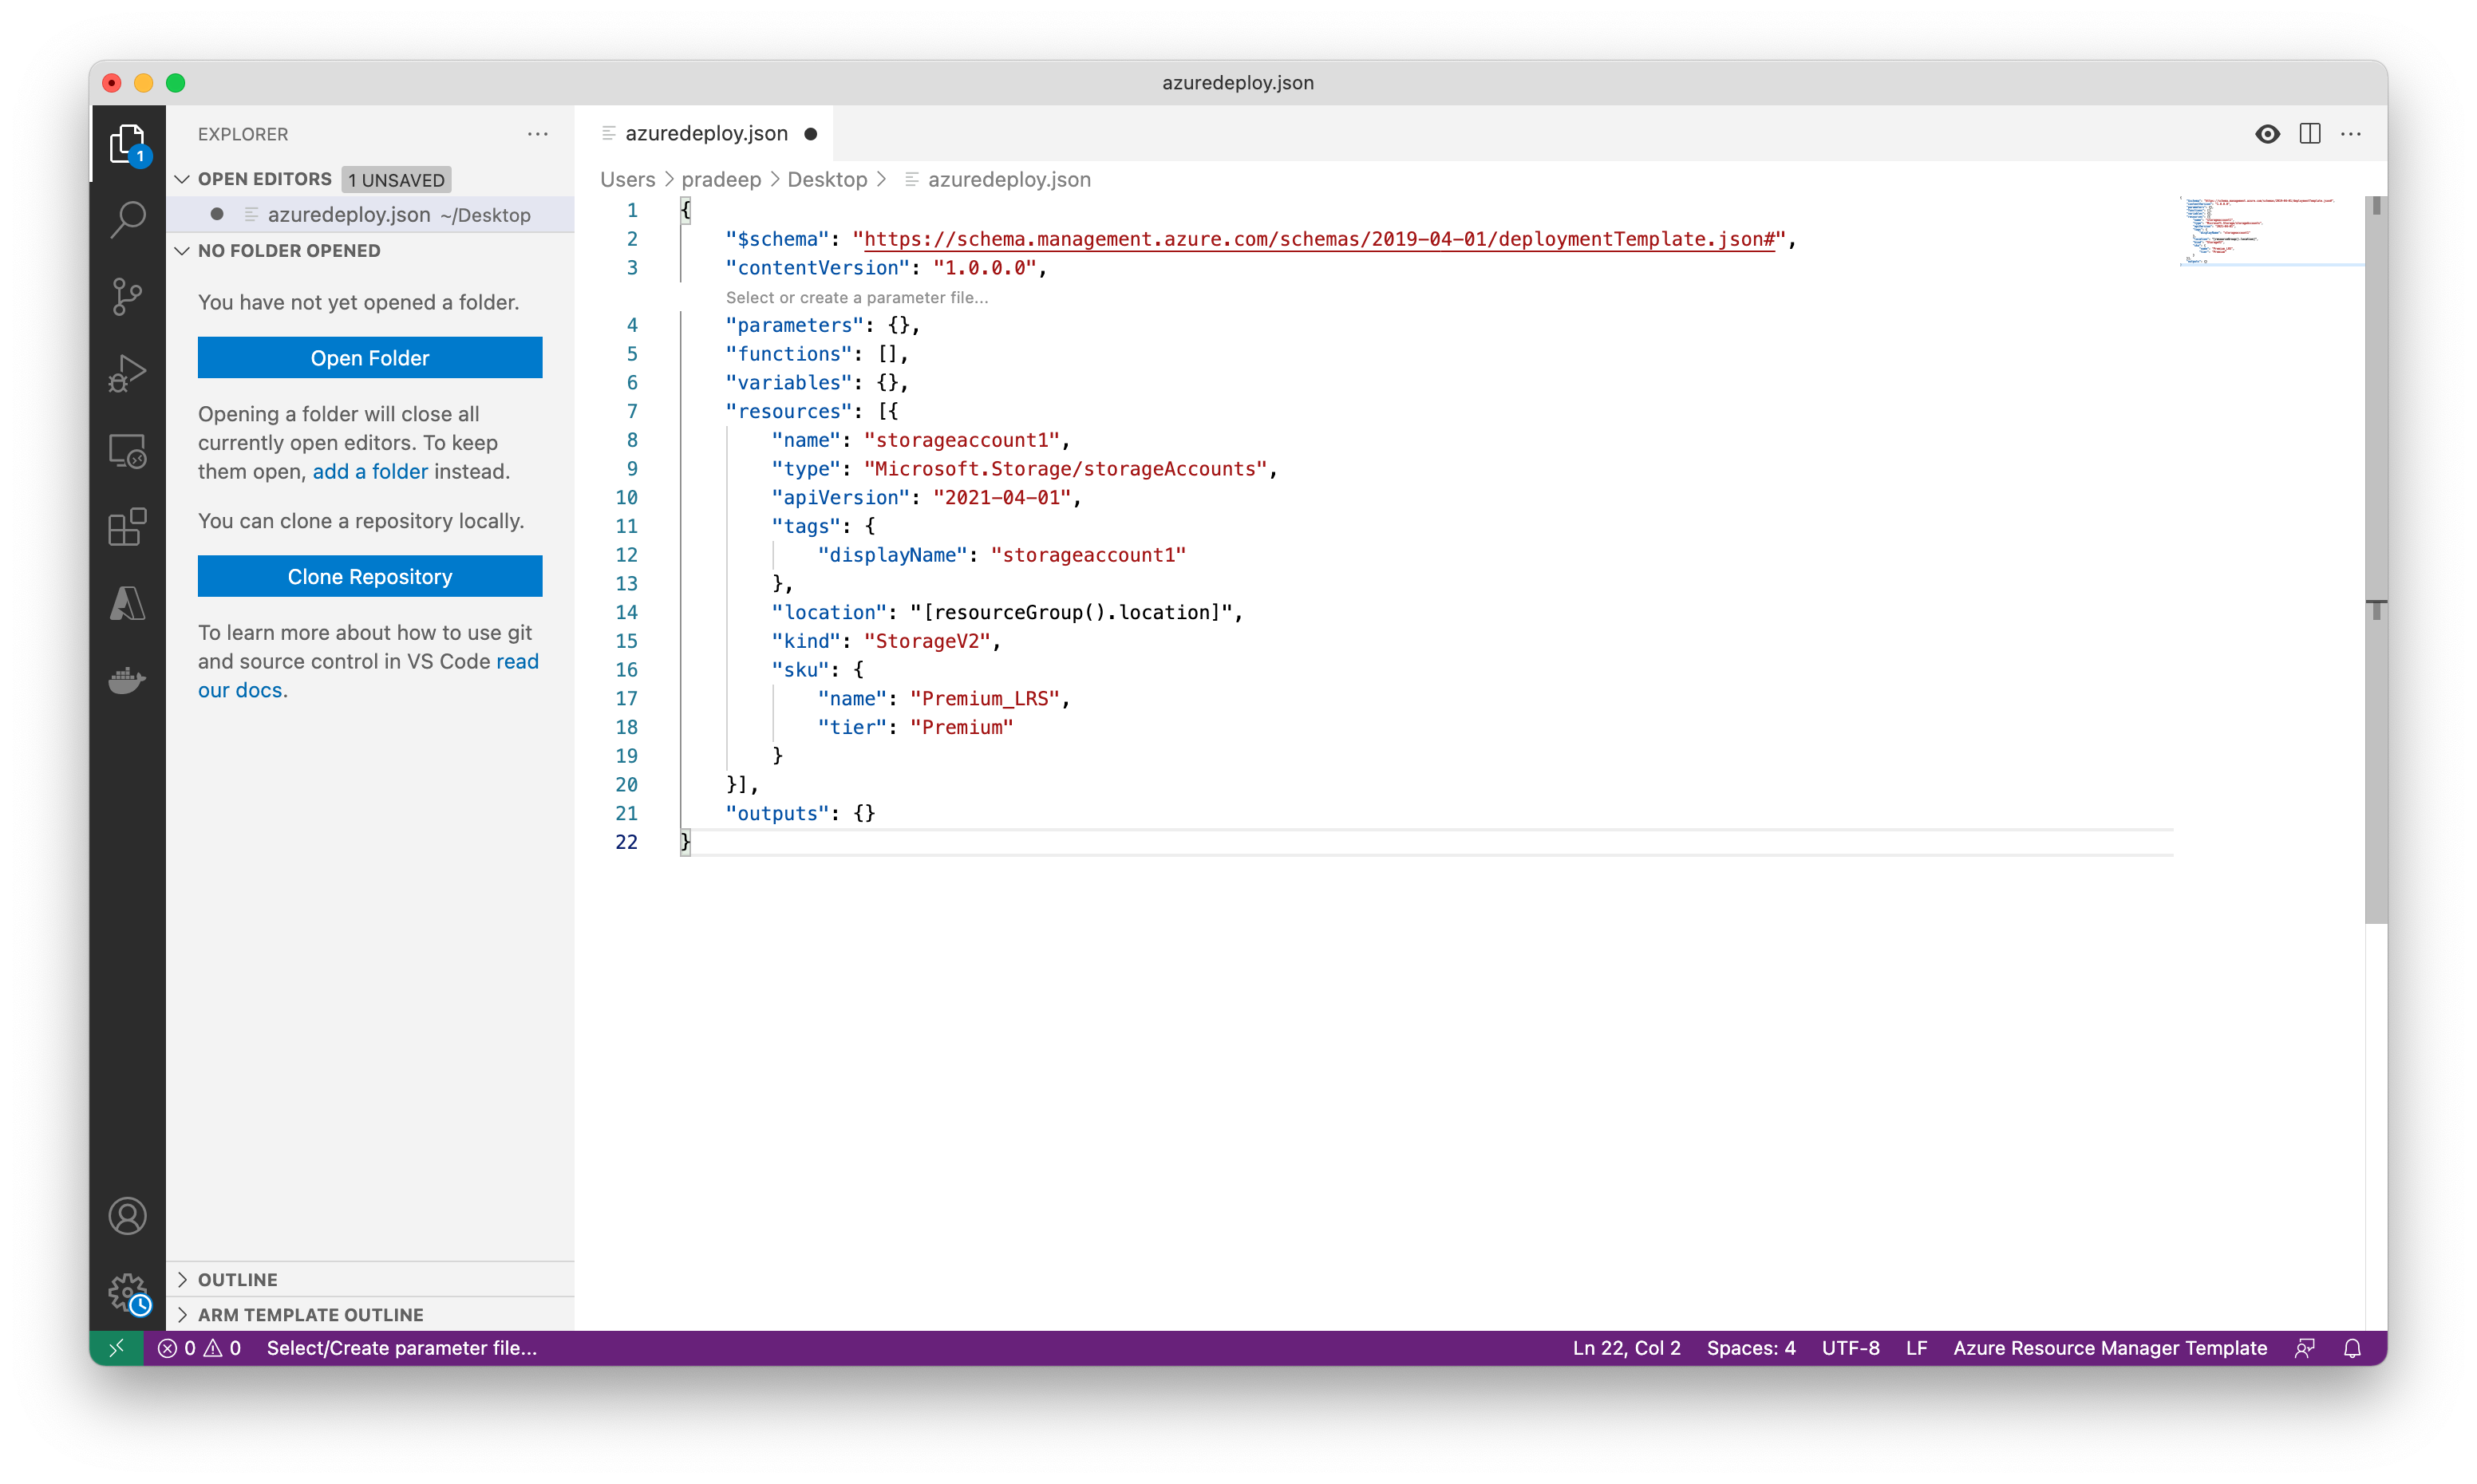
Place the cursor in the template resources block, type in storage, and select the arm-storage snippet.
Add parameters to the template
Now you will create and use a parameter to specify the storage account name.
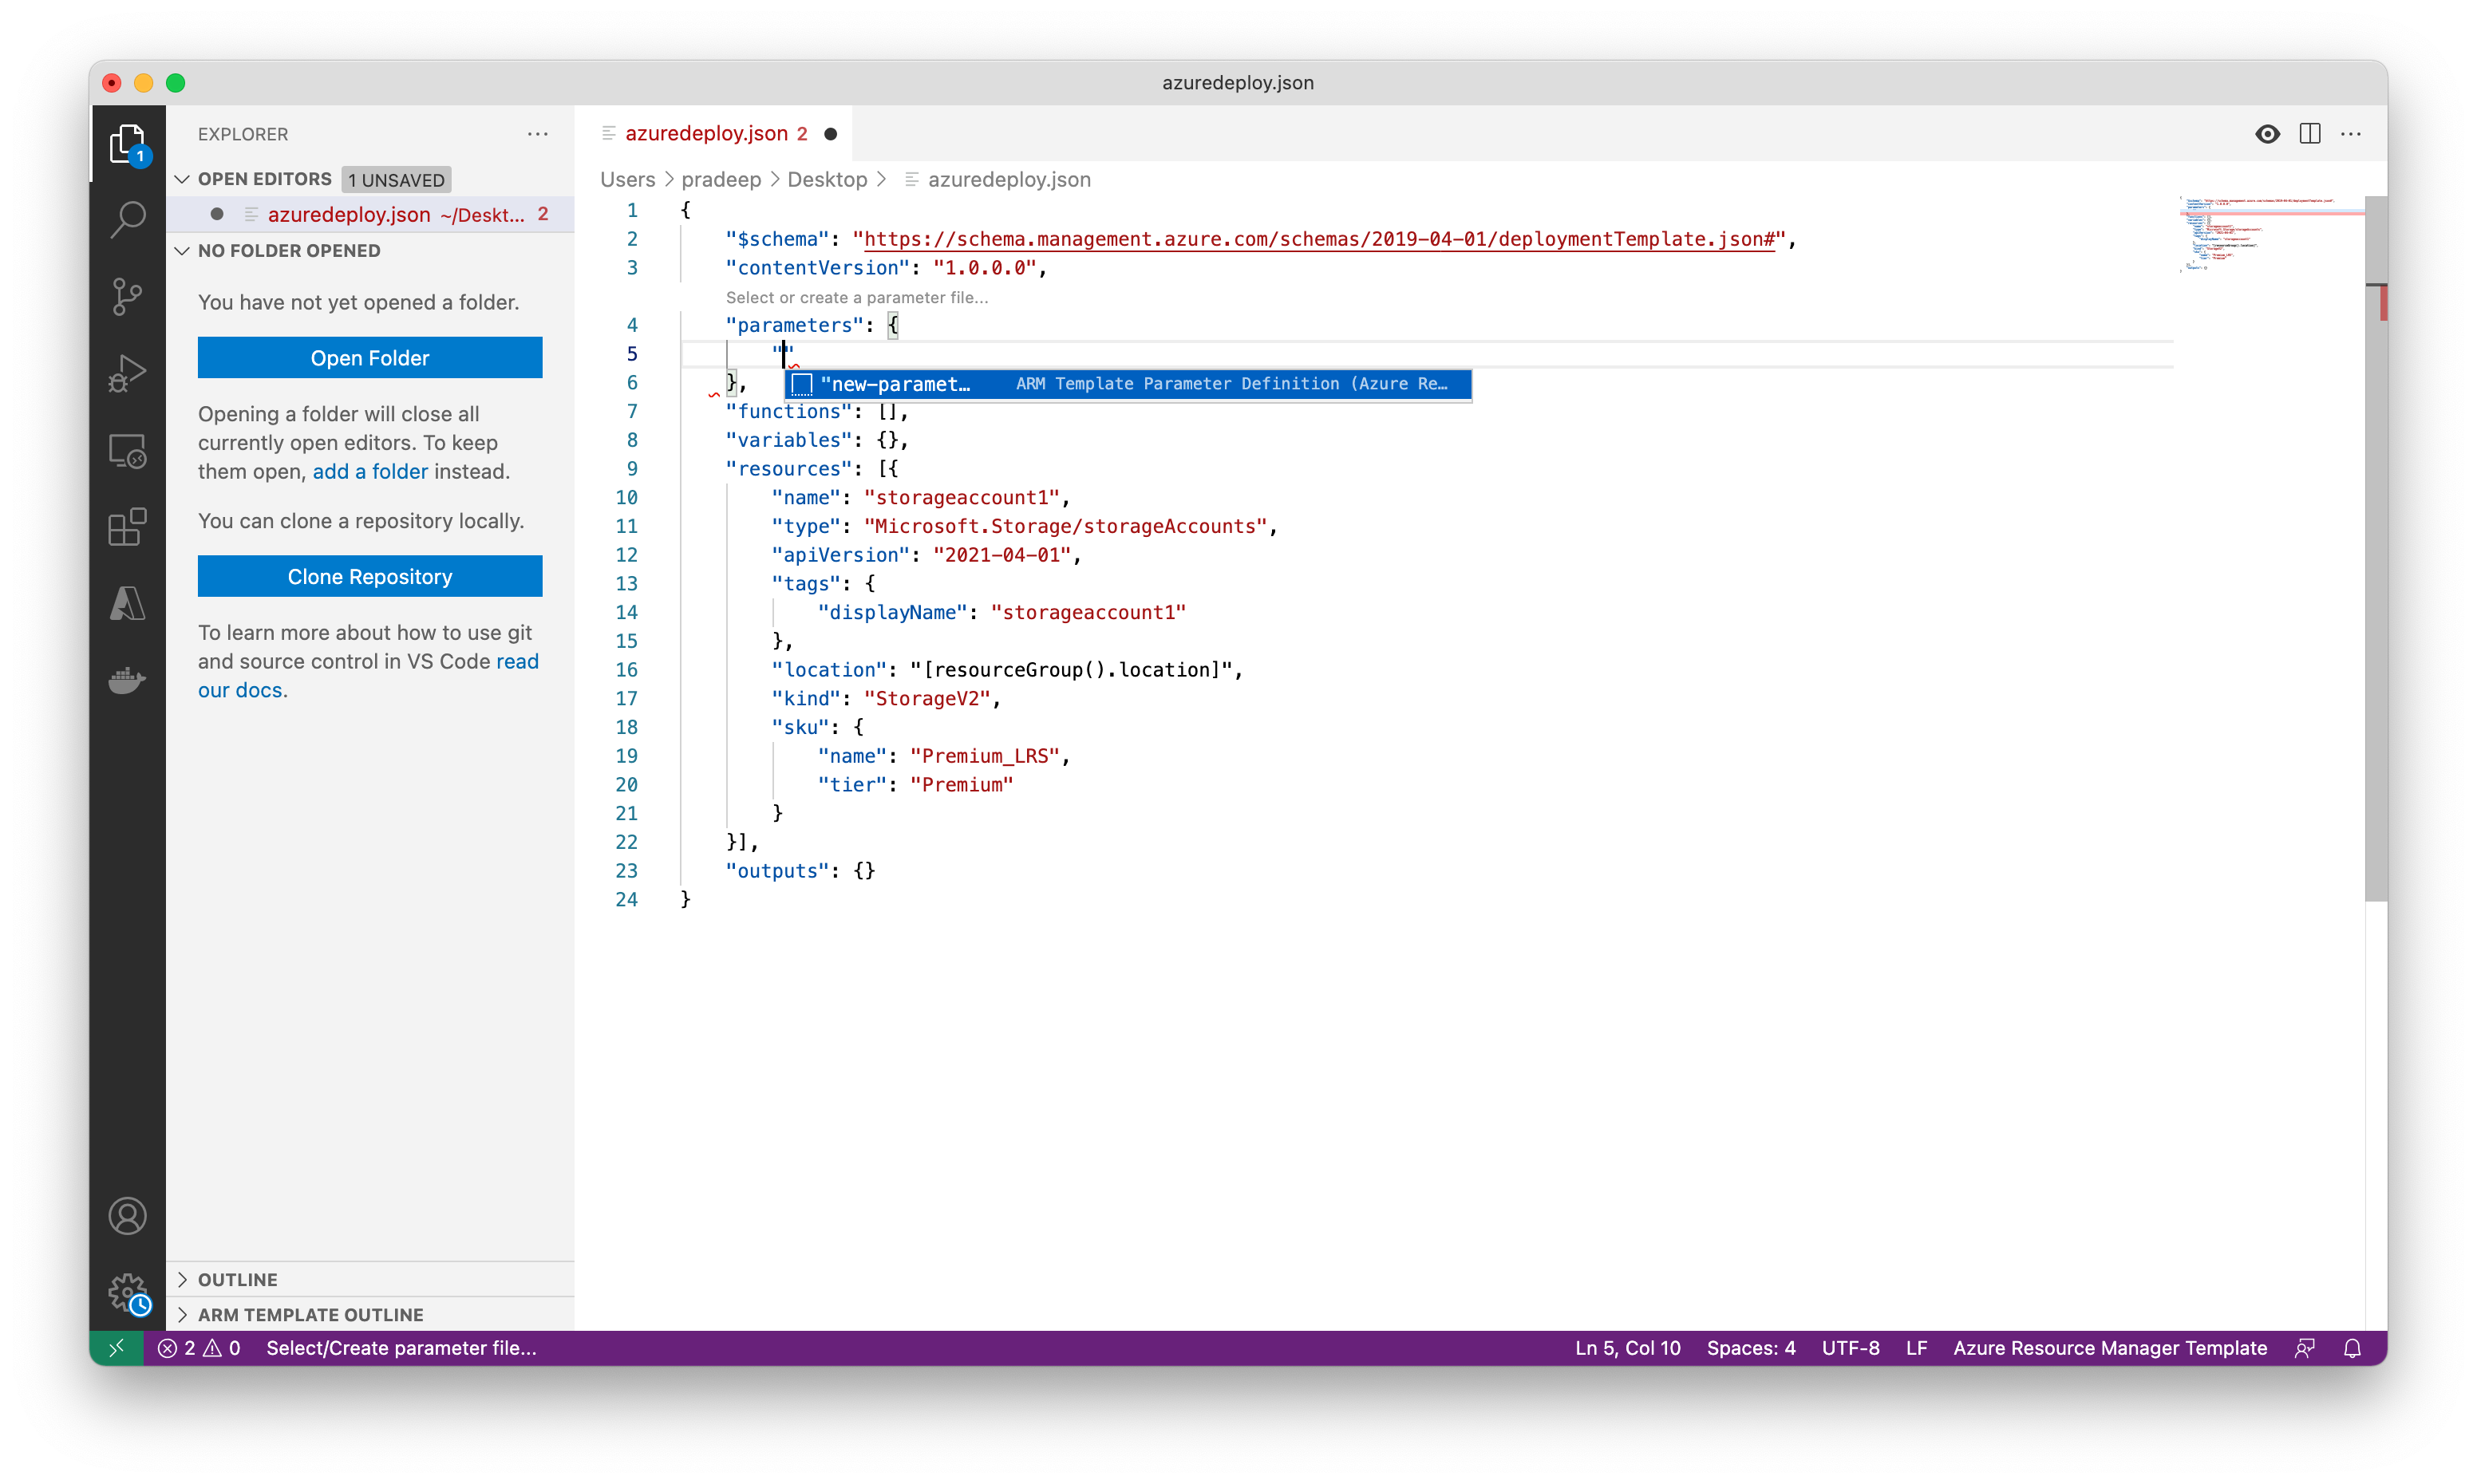
Place your cursor in the parameters block, add a carriage return, type “, and then select the new-parameter snippet. This action adds a generic parameter to the template.
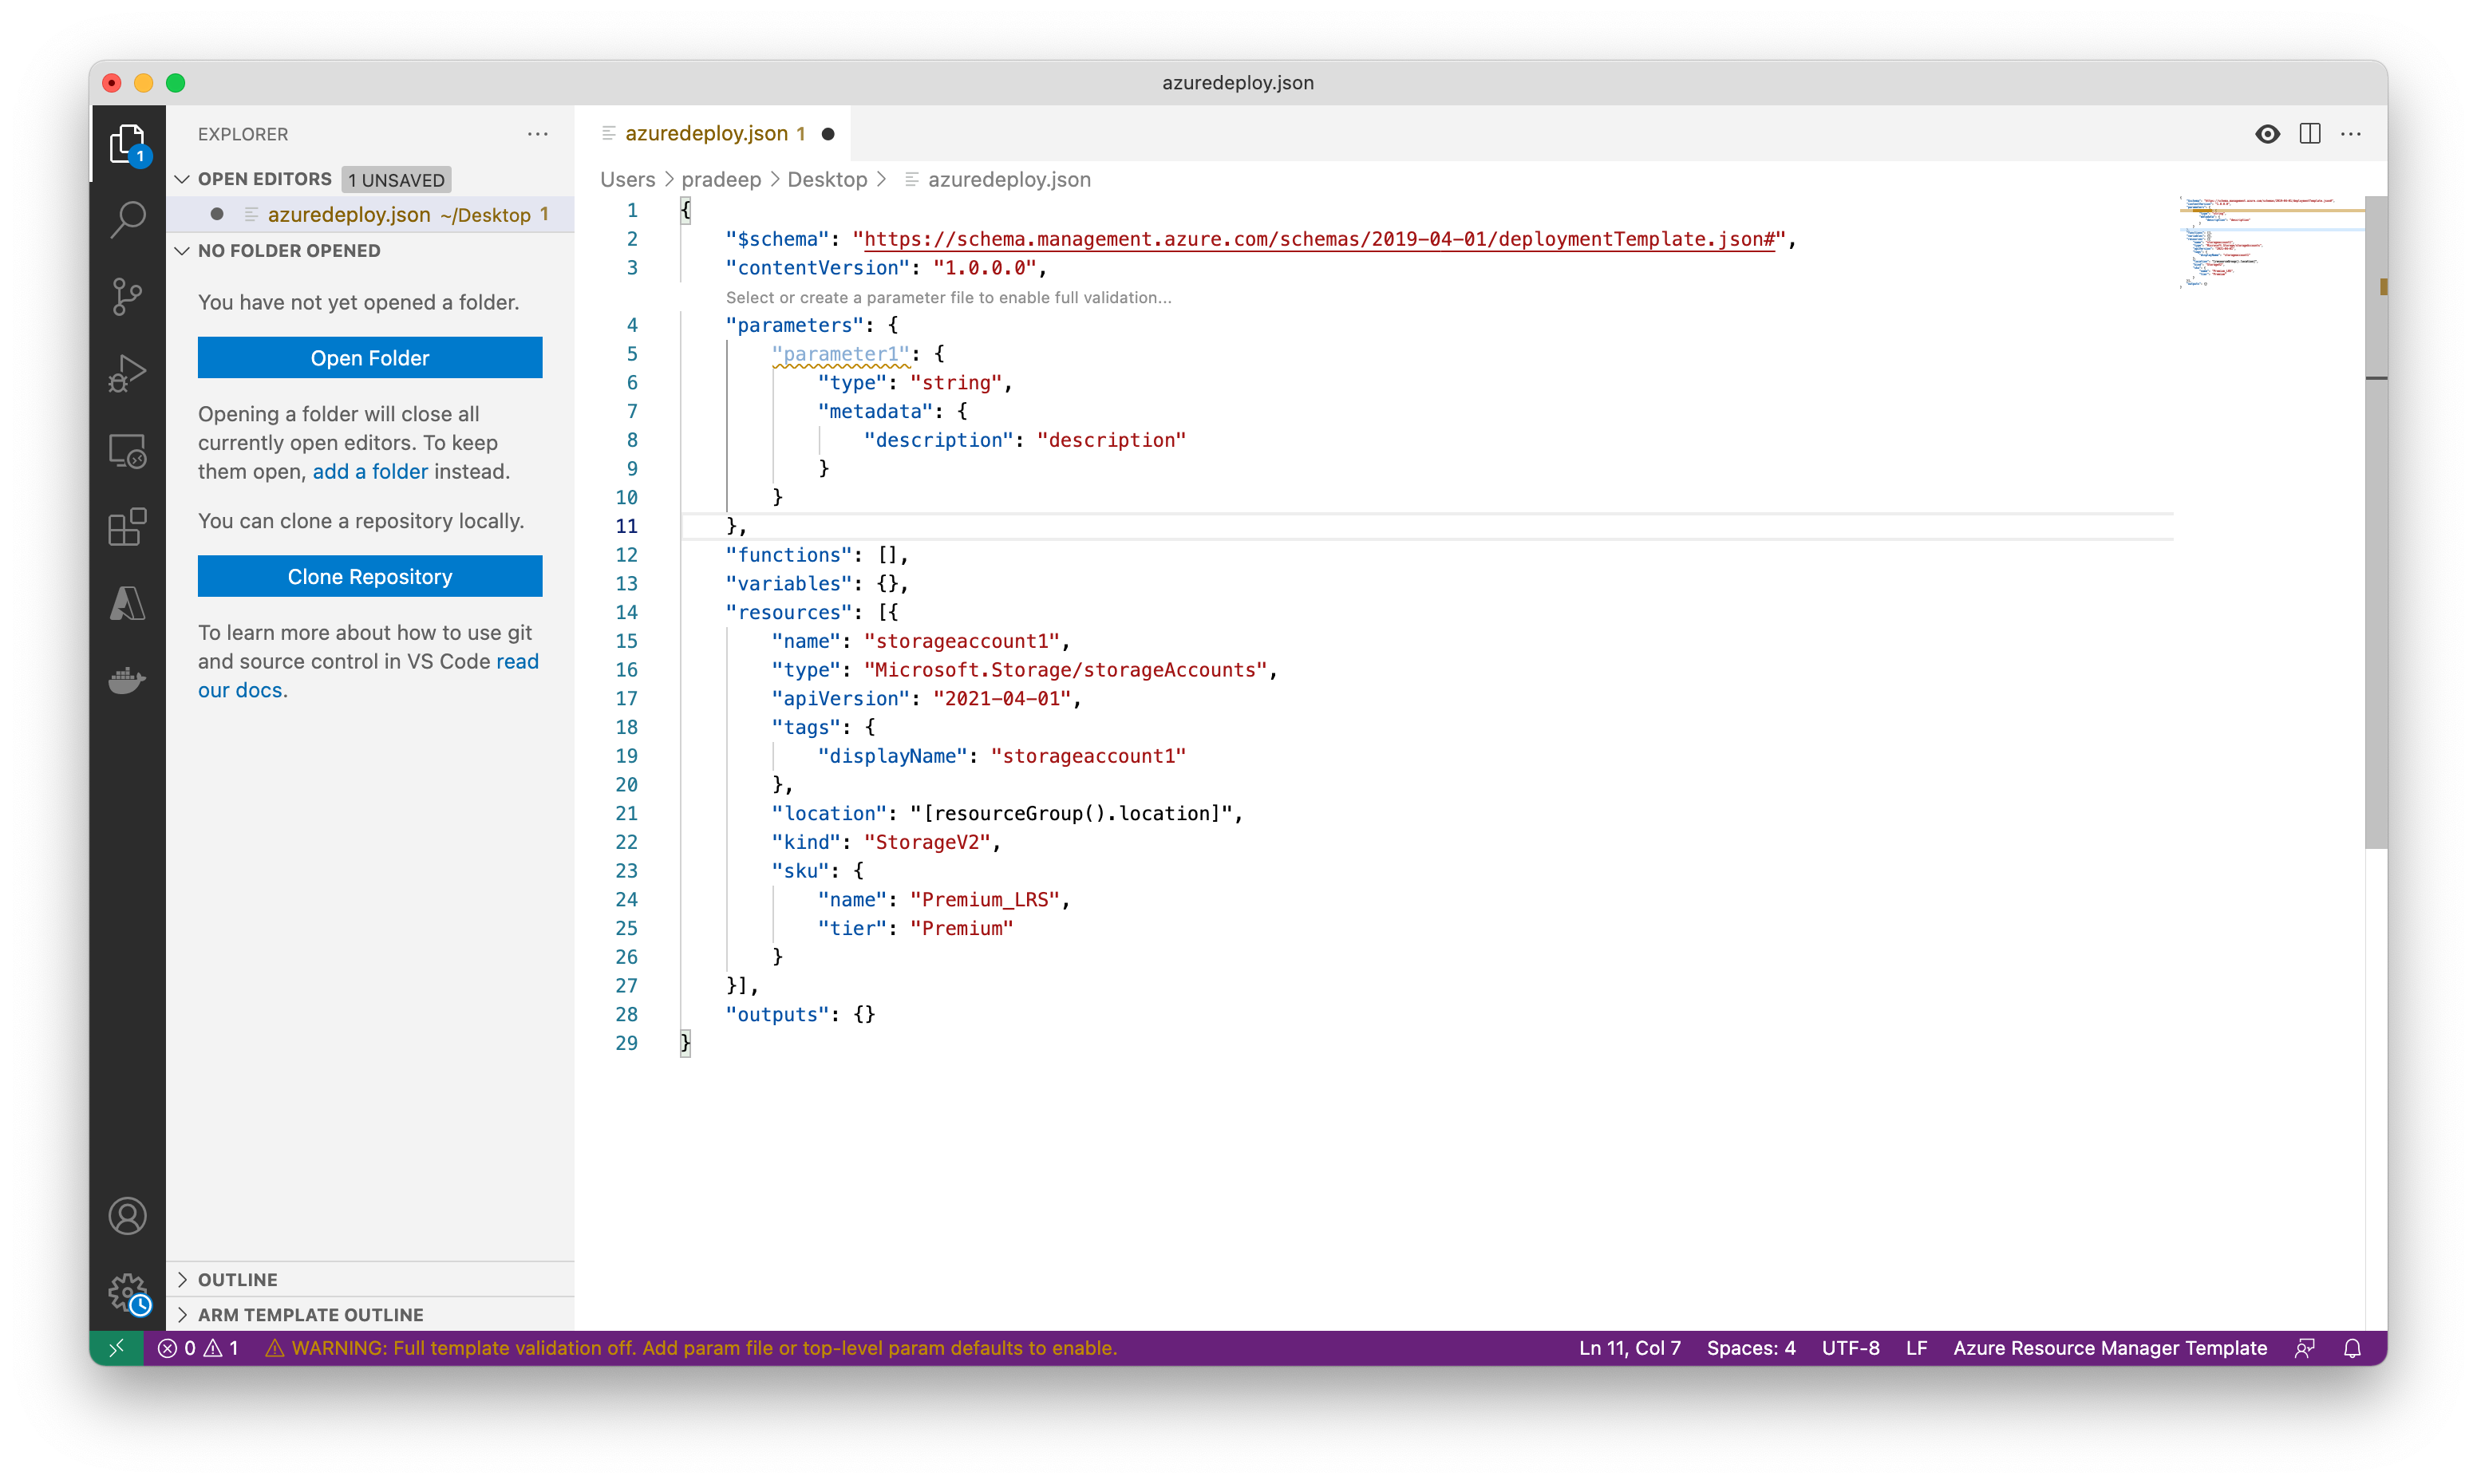
Make the following changes to the new parameter you just added:
Update the name of the parameter to storageAccountName and the description to Storage Account Name.
Azure storage account names have a minimum length of 3 characters and a maximum of 24. Add both minLength and maxLength to the parameter and provide appropriate values.
Follow the steps below to update the name property of the storage resource to use the parameter.
In the resources block, delete the current default name which is storageaccount1 in the examples above. Leave the quotes (“”) around the name in place. Enter a square bracket [, which produces a list of Azure Resource Manager template functions. Select parameters from the list. Add () at the end of parameters and select storageAccountName from the pop-up. If the list of parameters does not show up automatically you can enter a single quote ‘ inside of the round brackets to display the list.
Create a parameter file
An Azure Resource Manager template parameter file allows you to store environment-specific parameter values and pass these values in as a group at deployment time. This is useful if you want to have values specific to a test or production environment, for example. The extension makes it easy to create a parameter file that is mapped to your existing template. Follow the steps below to create a parameter file.
With the azuredeploy.json file in focus open the Command Palette by selecting View > Command Palette from the menu bar.
In the Command Palette enter “parameter” in the search bar and select Azure Resource Manager Tools:Select/Create Parameter File.
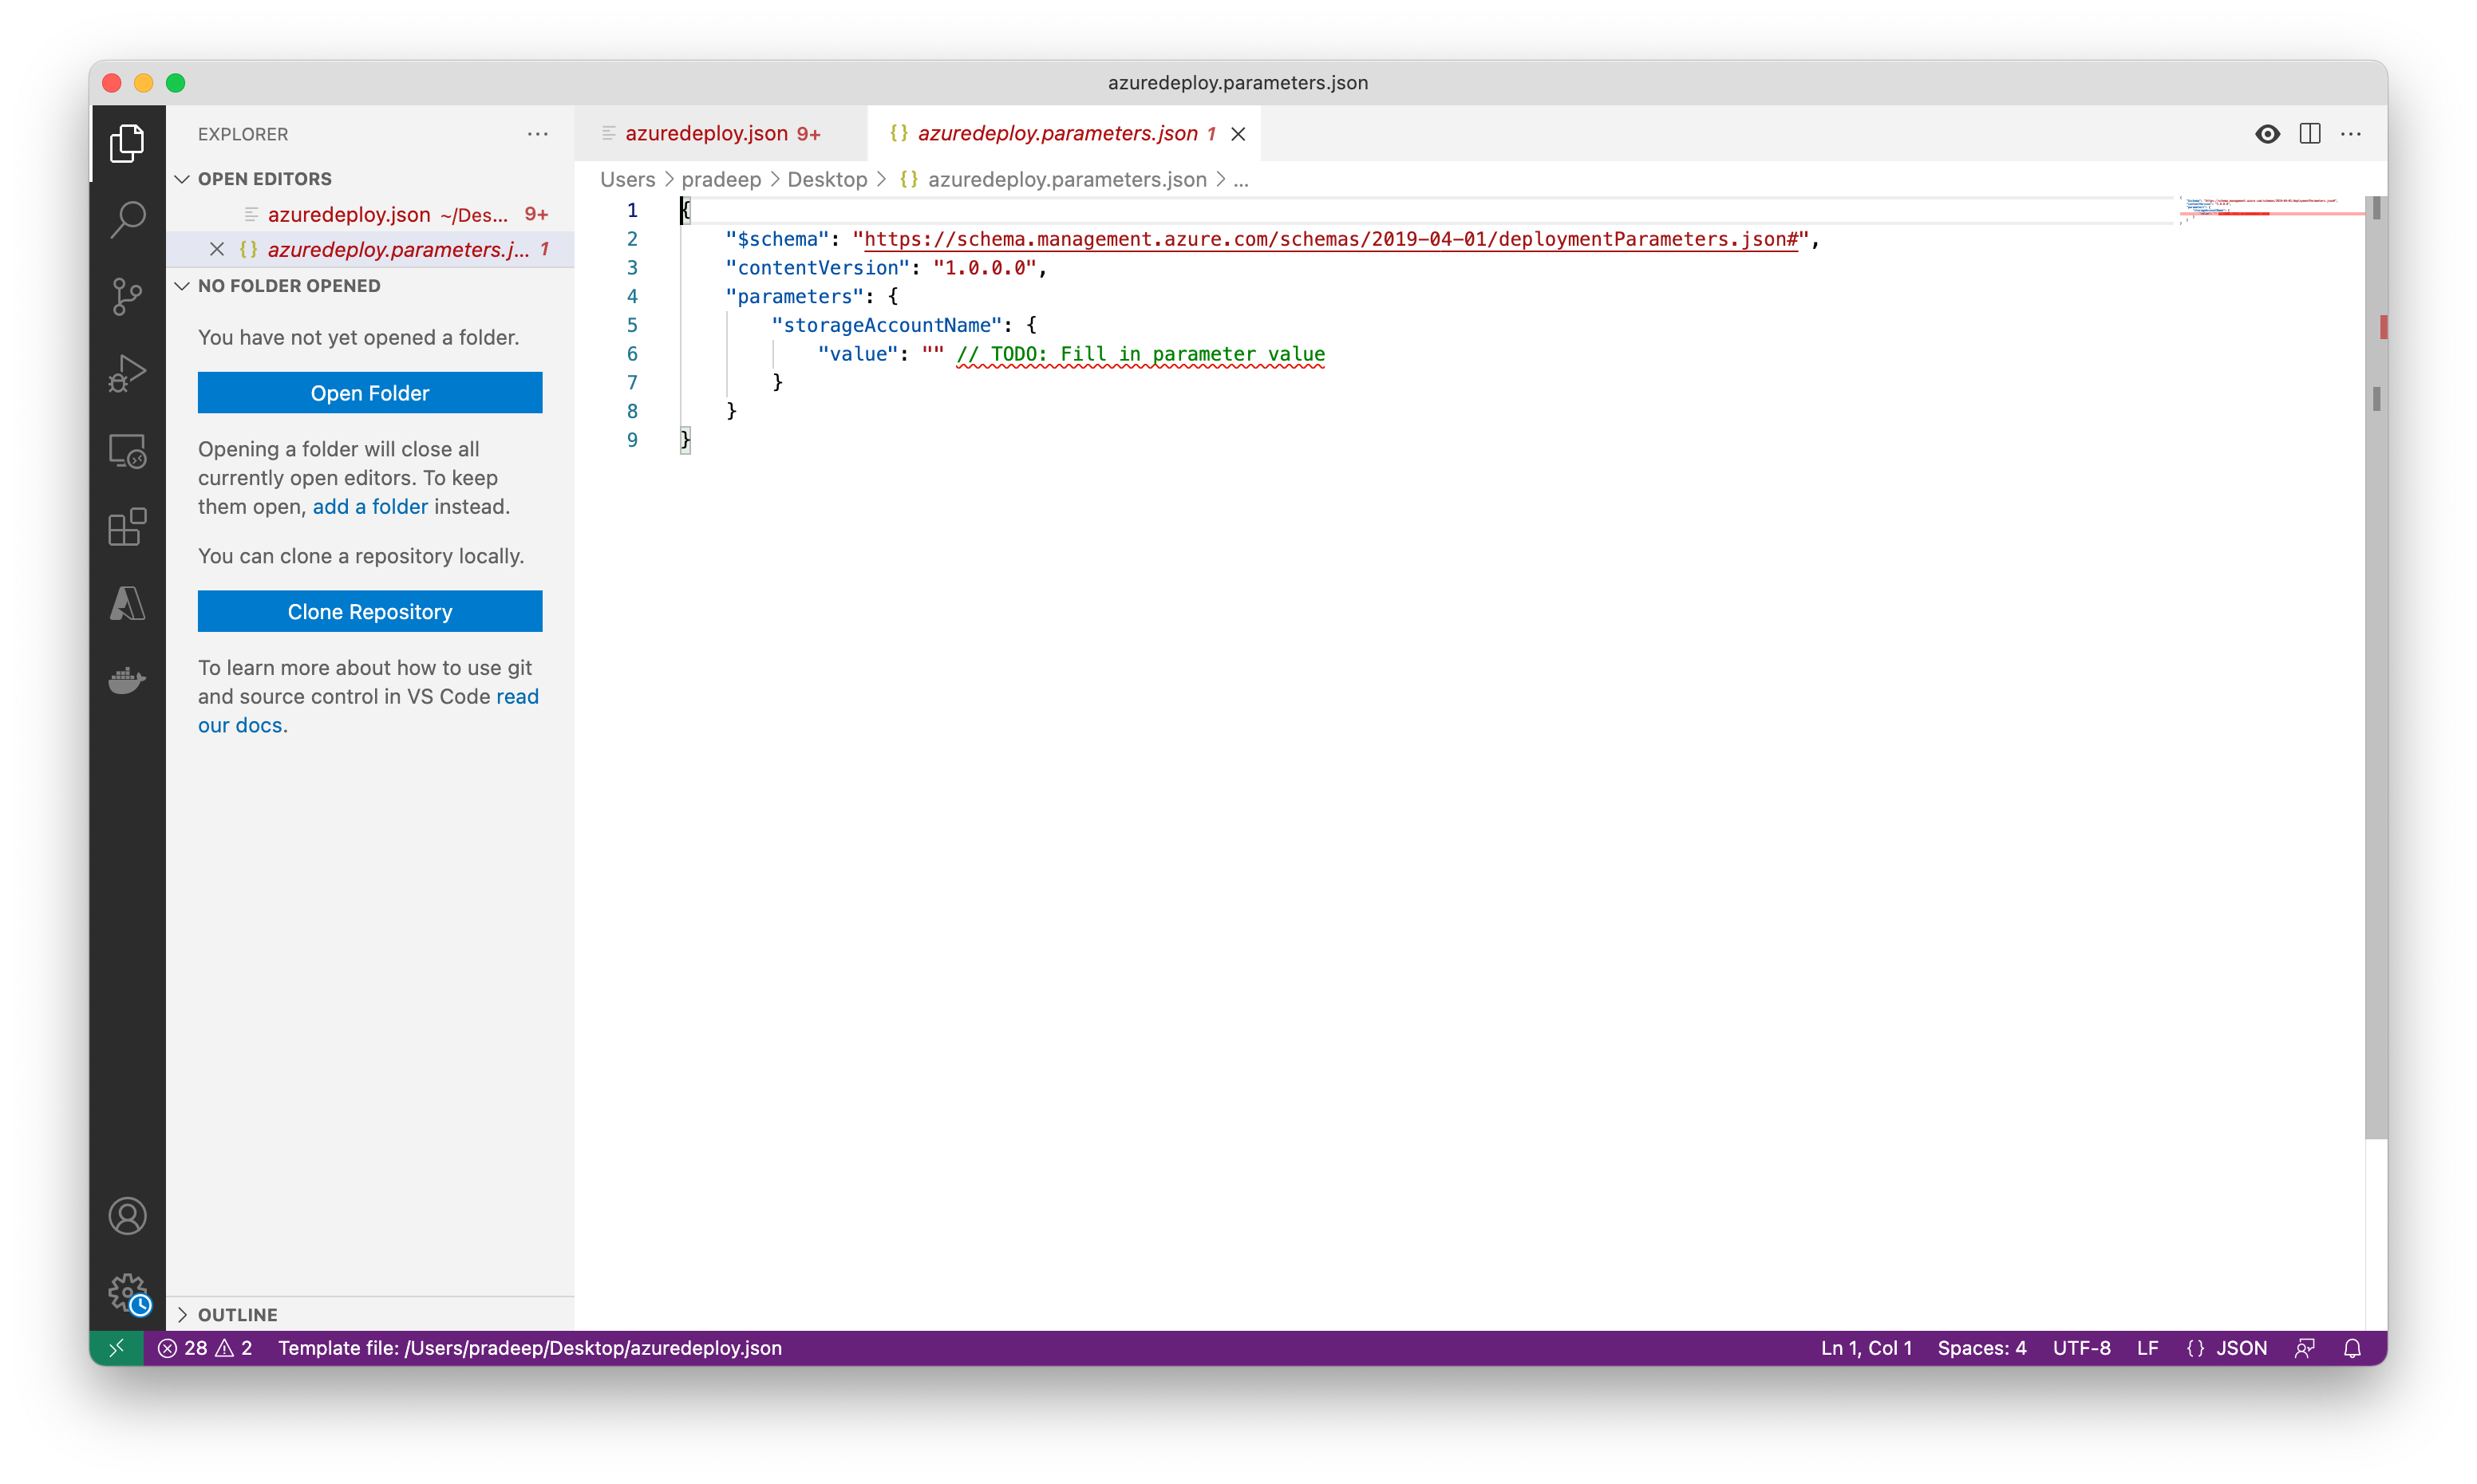
A new dialog box will open at the top of the editor. From those options select New, then select All Parameters. Accept the default name for the new file.
Edit the value parameter and type in a name that meets the naming requirements.
Deploy the template
It’s time to deploy the template. Follow the steps below, in the VS Code terminal, to connect to Azure and deploy the new storage account resource.
Connect to Azure by using the az login command.
pradeep:~$az login
A web browser has been opened at https://login.microsoftonline.com/organizations/oauth2/v2.0/authorize. Please continue the login in the web browser. If no web browser is available or if the web browser fails to open, use device code flow with `az login --use-device-code`.
[
  {
    "cloudName": "AzureCloud",
    "homeTenantId": "dc59789f-e59b-4d89-88eb-406a51421a63",
    "id": "f3f98f91-9191-4dd5-a561-cc5b31d0c201",
    "isDefault": true,
    "managedByTenants": [],
    "name": "Pradeep",
    "state": "Enabled",
    "tenantId": "dc59789f-e59b-4d89-88eb-406a51421a63",
    "user": {
      "name": "gaddepradeep@gmail.com",
      "type": "user"
    }
  }
]
pradeep:~$
Create a resource group to contain the new resource.
pradeep:~$az group create --name pradeep-arm-rg --location southindia
{
  "id": "/subscriptions/f3f98f91-9191-4dd5-a561-cc5b31d0c201/resourceGroups/pradeep-arm-rg",
  "location": "southindia",
  "managedBy": null,
  "name": "pradeep-arm-rg",
  "properties": {
    "provisioningState": "Succeeded"
  },
  "tags": null,
  "type": "Microsoft.Resources/resourceGroups"
}
pradeep:~$
Use the az deployment group create command to deploy your template. The deployment will take a few minutes to complete, progress will be shown in the terminal.
pradeep:~$az  deployment group create --resource-group pradeep-arm-rg --template-file azuredeploy.json --parameters azuredeploy.parameters.json
 \ Running ..
After some time,
pradeep:~$az  deployment group create --resource-group pradeep-arm-rg --template-file azuredeploy.json --parameters azuredeploy.parameters.json
{
  "id": "/subscriptions/f3f98f91-9191-4dd5-a561-cc5b31d0c201/resourceGroups/pradeep-arm-rg/providers/Microsoft.Resources/deployments/azuredeploy",
  "location": null,
  "name": "azuredeploy",
  "properties": {
    "correlationId": "1fbde1f3-6f5a-4df8-abc7-d92d755a2966",
    "debugSetting": null,
    "dependencies": [],
    "duration": "PT30.8616872S",
    "error": null,
    "mode": "Incremental",
    "onErrorDeployment": null,
    "outputResources": [
      {
        "id": "/subscriptions/f3f98f91-9191-4dd5-a561-cc5b31d0c201/resourceGroups/pradeep-arm-rg/providers/Microsoft.Storage/storageAccounts/pradeepstorageaccountarm",
        "resourceGroup": "pradeep-arm-rg"
      }
    ],
    "outputs": {},
    "parameters": {
      "storageAccountName": {
        "type": "String",
        "value": "pradeepstorageaccountarm"
      }
    },
    "parametersLink": null,
    "providers": [
      {
        "id": null,
        "namespace": "Microsoft.Storage",
        "providerAuthorizationConsentState": null,
        "registrationPolicy": null,
        "registrationState": null,
        "resourceTypes": [
          {
            "aliases": null,
            "apiProfiles": null,
            "apiVersions": null,
            "capabilities": null,
            "defaultApiVersion": null,
            "locationMappings": null,
            "locations": [
              "southindia"
            ],
            "properties": null,
            "resourceType": "storageAccounts"
          }
        ]
      }
    ],
    "provisioningState": "Succeeded",
    "templateHash": "8341637310228357492",
    "templateLink": null,
    "timestamp": "2022-05-26T16:03:09.218705+00:00",
    "validatedResources": null
  },
  "resourceGroup": "pradeep-arm-rg",
  "tags": null,
  "type": "Microsoft.Resources/deployments"
}
pradeep:~$
You can verify the deployment by running the command below.
pradeep:~$az storage account show --resource-group pradeep-arm-rg --name pradeepstorageaccountarm
{
  "accessTier": "Hot",
  "allowBlobPublicAccess": true,
  "allowCrossTenantReplication": null,
  "allowSharedKeyAccess": null,
  "allowedCopyScope": null,
  "azureFilesIdentityBasedAuthentication": null,
  "blobRestoreStatus": null,
  "creationTime": "2022-05-26T16:02:40.391208+00:00",
  "customDomain": null,
  "defaultToOAuthAuthentication": null,
  "enableHttpsTrafficOnly": true,
  "enableNfsV3": null,
  "encryption": {
    "encryptionIdentity": null,
    "keySource": "Microsoft.Storage",
    "keyVaultProperties": null,
    "requireInfrastructureEncryption": null,
    "services": {
      "blob": {
        "enabled": true,
        "keyType": "Account",
        "lastEnabledTime": "2022-05-26T16:02:40.453685+00:00"
      },
      "file": {
        "enabled": true,
        "keyType": "Account",
        "lastEnabledTime": "2022-05-26T16:02:40.453685+00:00"
      },
      "queue": null,
      "table": null
    }
  },
  "extendedLocation": null,
  "failoverInProgress": null,
  "geoReplicationStats": null,
  "id": "/subscriptions/f3f98f91-9191-4dd5-a561-cc5b31d0c201/resourceGroups/pradeep-arm-rg/providers/Microsoft.Storage/storageAccounts/pradeepstorageaccountarm",
  "identity": null,
  "immutableStorageWithVersioning": null,
  "isHnsEnabled": null,
  "isLocalUserEnabled": null,
  "isSftpEnabled": null,
  "keyCreationTime": {
    "key1": "2022-05-26T16:02:40.453685+00:00",
    "key2": "2022-05-26T16:02:40.453685+00:00"
  },
  "keyPolicy": null,
  "kind": "StorageV2",
  "largeFileSharesState": null,
  "lastGeoFailoverTime": null,
  "location": "southindia",
  "minimumTlsVersion": "TLS1_0",
  "name": "pradeepstorageaccountarm",
  "networkRuleSet": {
    "bypass": "AzureServices",
    "defaultAction": "Allow",
    "ipRules": [],
    "resourceAccessRules": null,
    "virtualNetworkRules": []
  },
  "primaryEndpoints": {
    "blob": "https://pradeepstorageaccountarm.blob.core.windows.net/",
    "dfs": null,
    "file": null,
    "internetEndpoints": null,
    "microsoftEndpoints": null,
    "queue": null,
    "table": null,
    "web": "https://pradeepstorageaccountarm.z30.web.core.windows.net/"
  },
  "primaryLocation": "southindia",
  "privateEndpointConnections": [],
  "provisioningState": "Succeeded",
  "publicNetworkAccess": null,
  "resourceGroup": "pradeep-arm-rg",
  "routingPreference": null,
  "sasPolicy": null,
  "secondaryEndpoints": null,
  "secondaryLocation": null,
  "sku": {
    "name": "Premium_LRS",
    "tier": "Premium"
  },
  "statusOfPrimary": "available",
  "statusOfSecondary": null,
  "tags": {
    "displayName": "storageaccount1"
  },
  "type": "Microsoft.Storage/storageAccounts"
}
pradeep:~$
This is my Visual Studio Code screenshot.
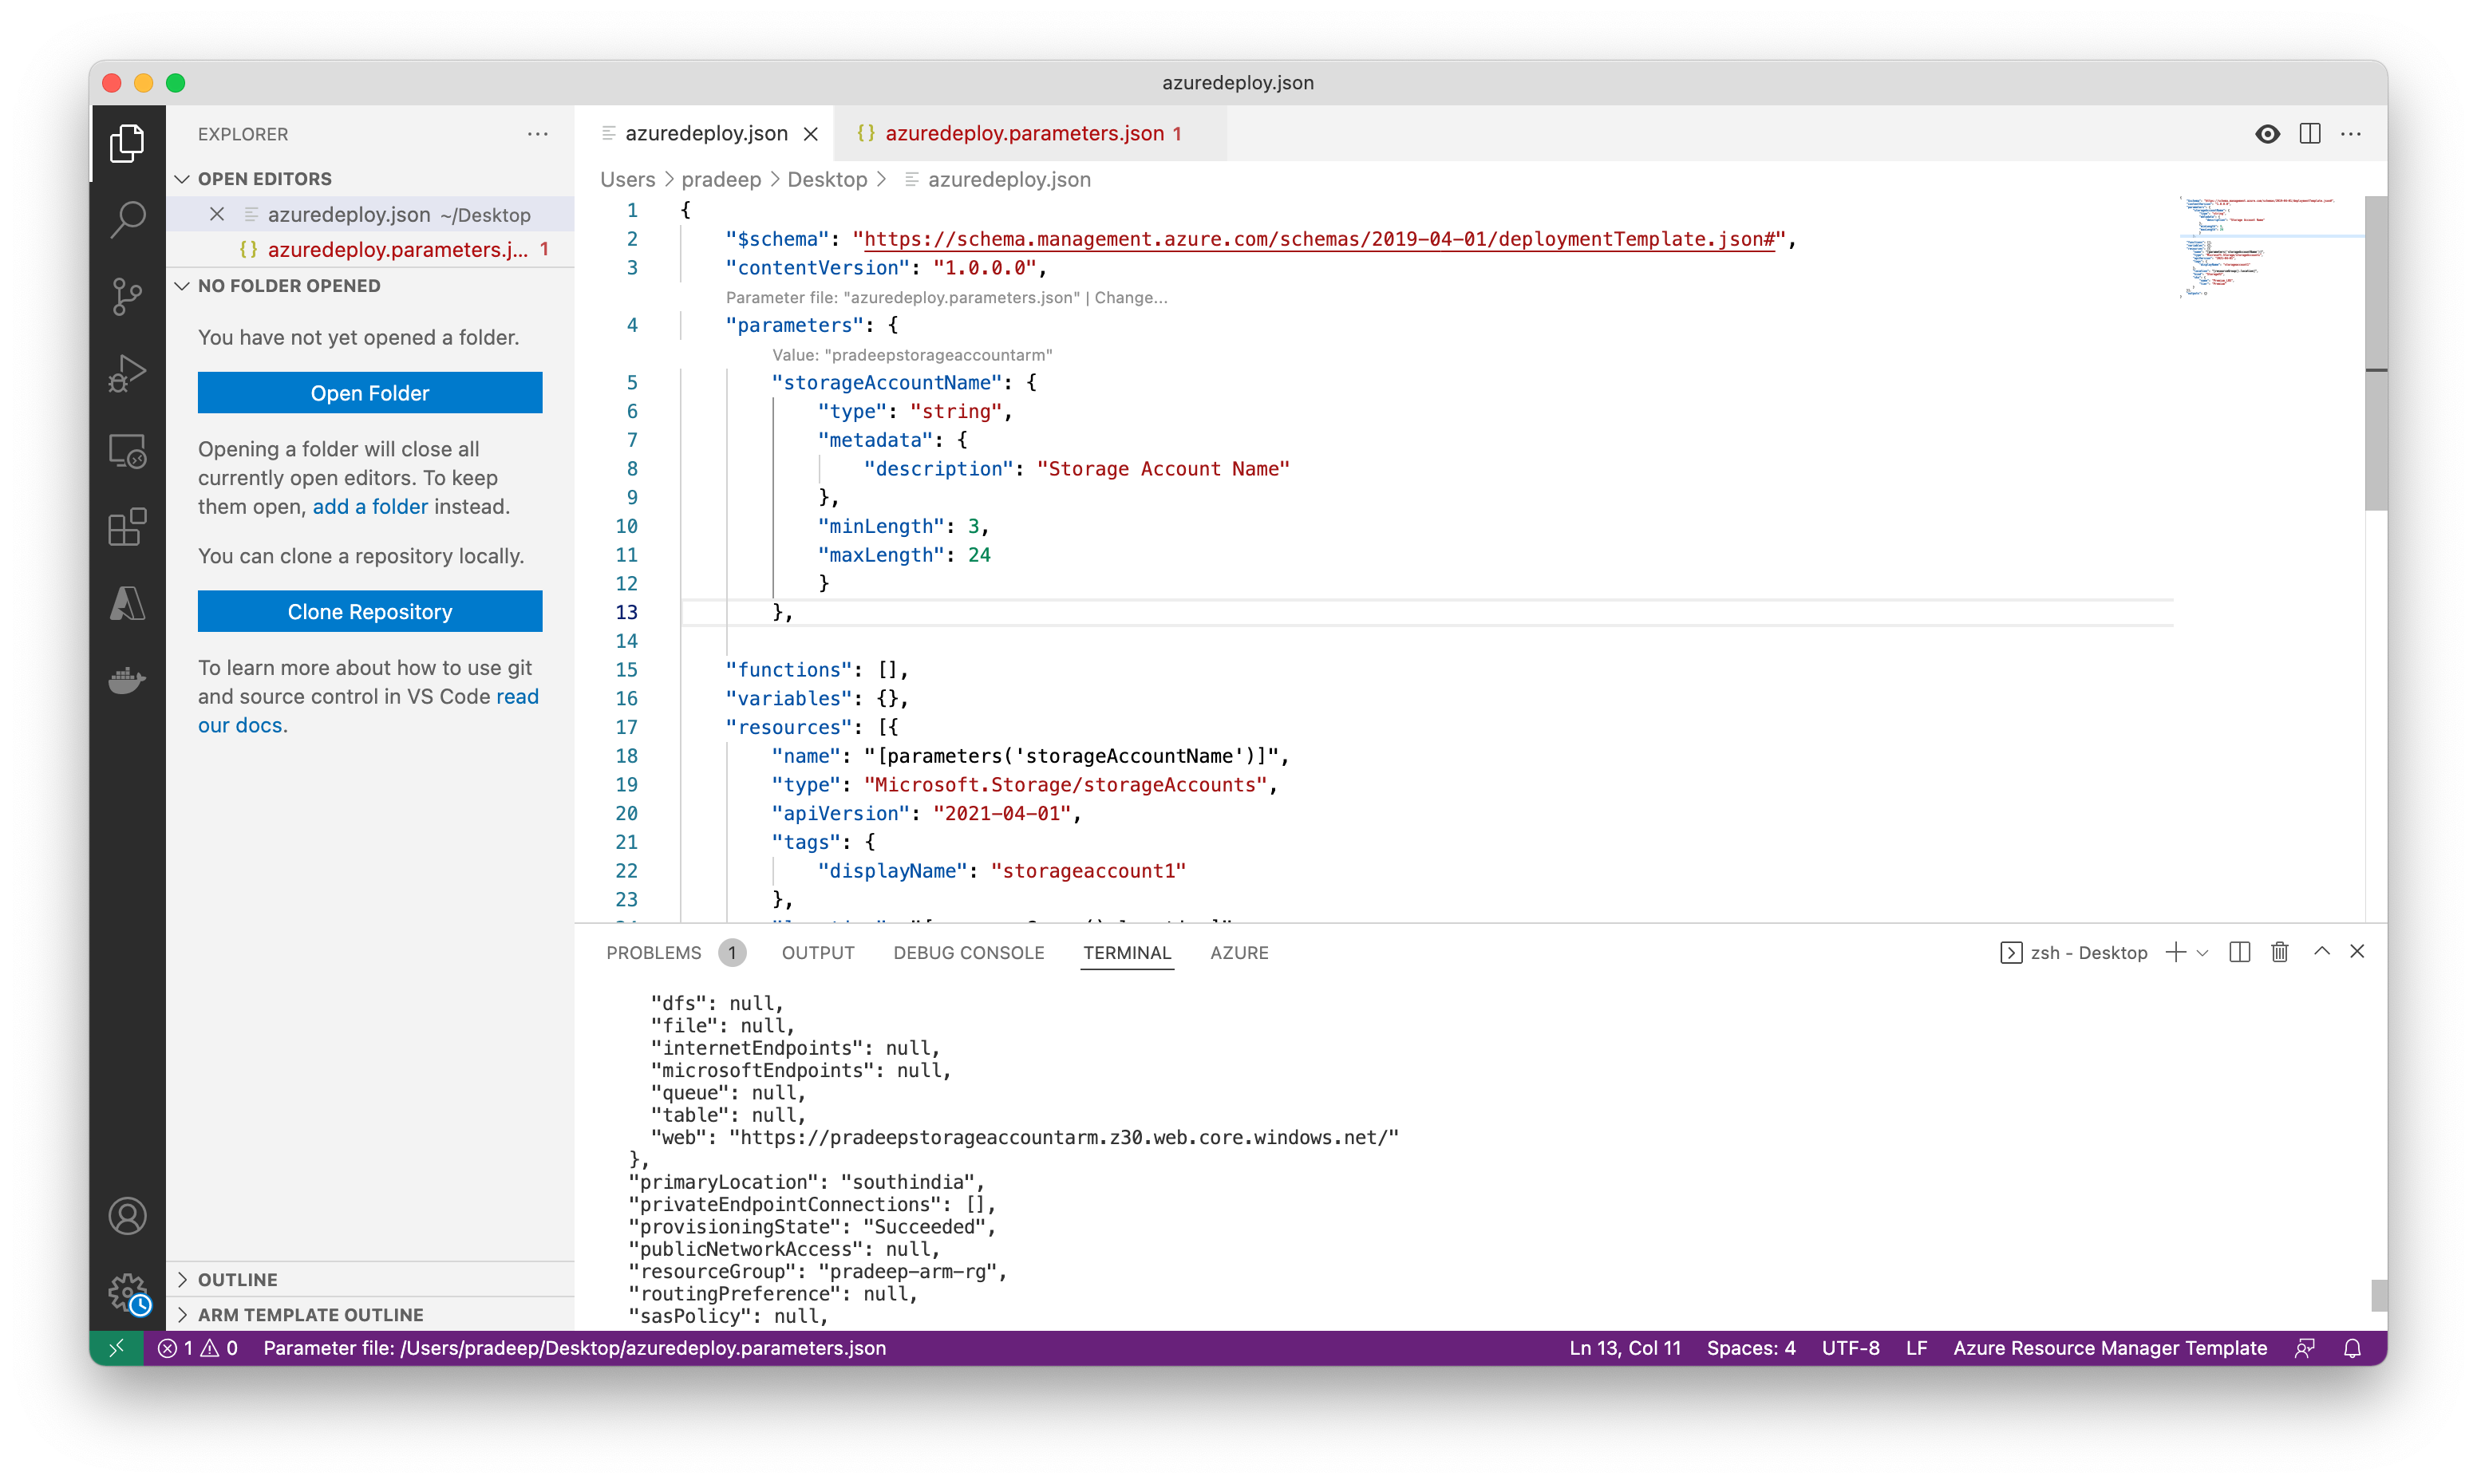
and here is the azuredeploy.json file
{
    "$schema": "https://schema.management.azure.com/schemas/2019-04-01/deploymentTemplate.json#",
    "contentVersion": "1.0.0.0",
    "parameters": {
        "storageAccountName": {
            "type": "string",
            "metadata": {
                "description": "Storage Account Name"
            },
            "minLength": 3,
            "maxLength": 24
            }
        },

    "functions": [],
    "variables": {},
    "resources": [{
        "name": "[parameters('storageAccountName')]",
        "type": "Microsoft.Storage/storageAccounts",
        "apiVersion": "2021-04-01",
        "tags": {
            "displayName": "storageaccount1"
        },
        "location": "[resourceGroup().location]",
        "kind": "StorageV2",
        "sku": {
            "name": "Premium_LRS",
            "tier": "Premium"
        }
    }],
    "outputs": {}
}
and the contents of azuredeploy.parameters.json is here
{
    "$schema": "https://schema.management.azure.com/schemas/2019-04-01/deploymentParameters.json#",
    "contentVersion": "1.0.0.0",
    "parameters": {
        "storageAccountName": {
            "value": "pradeepstorageaccountarm" // TODO: Fill in parameter value
        }
    }
}
Finally, we can confirm that our storage account got created successfully from the Azure Mobile App
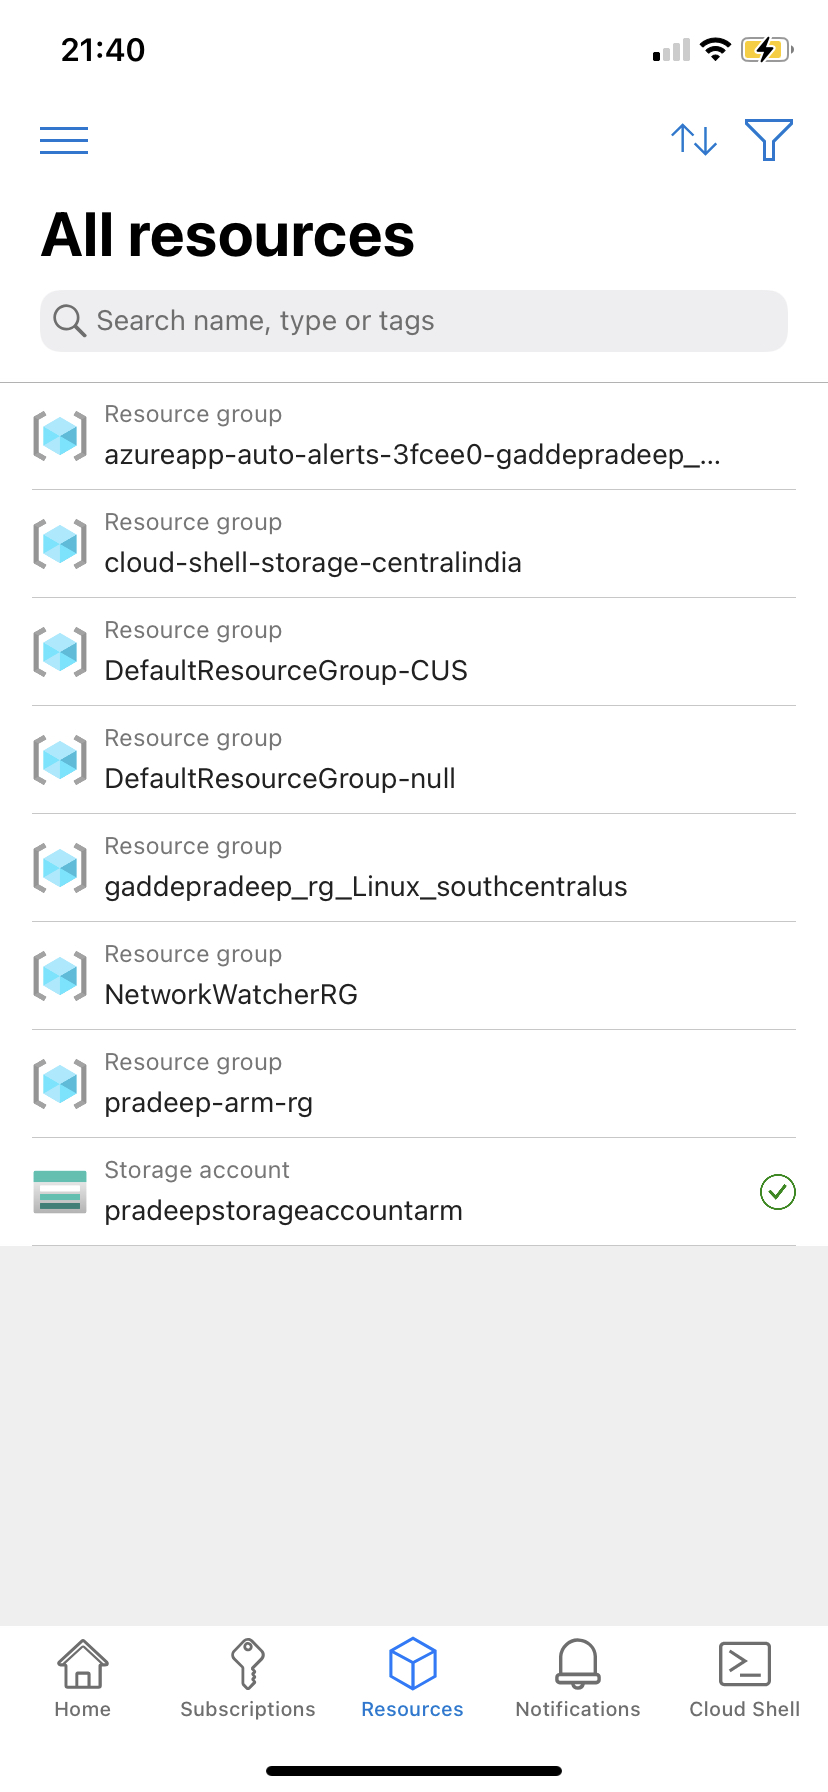
We can see that our new Storage Account and Resource Group are listed at the bottom, confirming that we have successfully completed the task!
Let us clean up resources now.
When the Azure resources are no longer needed use the Azure CLI command below to delete the resource group.
pradeep:~$az group delete --name pradeep-arm-rg --no-wait
Are you sure you want to perform this operation? (y/n): y
pradeep:~$


