
Build Infrastructure using Juniper Apstra Terraform Provider
Build Infrastructure using Juniper Apstra Terraform Provider
With Terraform installed, you are ready to create your first infrastructure in Juniper Apstra.
In this tutorial, you will provision an IPv4 Resource Pool with three blocks from RFC5737.
After creating the pool, it outputs the total number of IP addresses in the pool.
Write configuration
The set of files used to describe infrastructure in Terraform is known as a Terraform configuration. You will write your first configuration to define a single IPv4 Resource pool in Juniper Apstra.
Each Terraform configuration must be in its own working directory. Create a directory for your configuration.
pradeep@juniper ~ % mkdir apstra-terraform-3
pradeep@juniper ~ % cd apstra-terraform-3
pradeep@juniper apstra-terraform-3 % touch main.tf
pradeep@juniper apstra-terraform-3 %
Open main.tf in your text editor, paste in the configuration below, and save the file.
pradeep@juniper apstra-terraform-3 % cat main.tf
terraform {
  required_providers {
    apstra = {
      source  = "Juniper/apstra"
      version = ">= 0.28.0"
    }
  }
  required_version = ">= 1.1"
}
provider "apstra" {
  url = "https://admin:password@10.210.40.194:443"
  tls_validation_disabled = true
  blueprint_mutex_enabled = true
}

# This example creates an IPv4 Resource Pool with three allocations inside:
# - 3 blocks from RFC5737
#
# After creating the pool, it outputs the total number of
# IP addresses in the pool.

resource "apstra_ipv4_pool" "example" {
  name = "RFC 5737 ranges"
  subnets = [
    { network = "192.0.2.0/24"},
    { network = "198.51.100.0/24"},
    { network = "203.0.113.0/24"},
  ]
}

output "example_pool_size" {
    value = format("pool '%s' is sized for %d addresses", apstra_ipv4_pool.example.name, apstra_ipv4_pool.example.total)
  }
pradeep@juniper apstra-terraform-3 %
This is a complete configuration that you can deploy with Terraform. The following sections review each block of this configuration in more detail.
###
Terraform Block
The terraform {} block contains Terraform settings, including the required providers Terraform will use to provision your infrastructure. For each provider, the source attribute defines an optional hostname, a namespace, and the provider type. Terraform installs providers from the Terraform Registry by default. In this example configuration, the apstr provider’s source is defined as Juniper/apstra, which is shorthand for registry.terraform.io/Juniper/apstra.
You can also set a version constraint for each provider defined in the required_providers block. The version attribute is optional, but we recommend using it to constrain the provider version so that Terraform does not install a version of the provider that does not work with your configuration. If you do not specify a provider version, Terraform will automatically download the most recent version during initialization.
Providers
The provider block configures the specified provider, in this case apstra. A provider is a plugin that Terraform uses to create and manage your resources.
You can use multiple provider blocks in your Terraform configuration to manage resources from different providers. You can even use different providers together.
Resources
Use resource blocks to define components of your infrastructure. A resource might be a physical or virtual component such as an EC2 instance, or it can be a logical resource such as an IPv4 address pool in Juniper Apstra.
Resource blocks have two strings before the block: the resource type and the resource name. In this example, the resource type is apstra_ipv4_pool and the name is example. The prefix of the type maps to the name of the provider. In the example configuration, Terraform manages the apstra_ipv4_pool resource with the apstra provider. Together, the resource type and resource name form a unique ID for the resource. For example, the ID for your IPv4 pool is apstra_ipv4_pool.example.
Resource blocks contain arguments which you use to configure the resource. Arguments can include things like machine sizes, disk image names, or VPC IDs. Our providers reference lists the required and optional arguments for each resource. For yourIPv4 pool , the example configuration sets the name and the subnets.
Initialize the directory
When you create a new configuration — or check out an existing configuration from version control — you need to initialize the directory with terraform init.
Initializing a configuration directory downloads and installs the providers defined in the configuration, which in this case is the apstra provider.
Initialize the directory.
pradeep@juniper apstra-terraform-3 % terraform init

Initializing the backend...

Initializing provider plugins...
- Finding juniper/apstra versions matching ">= 0.28.0"...
- Installing juniper/apstra v0.42.0...
- Installed juniper/apstra v0.42.0 (signed by a HashiCorp partner, key ID CB9C922903A66F3F)

Partner and community providers are signed by their developers.
If you'd like to know more about provider signing, you can read about it here:
https://www.terraform.io/docs/cli/plugins/signing.html

Terraform has created a lock file .terraform.lock.hcl to record the provider
selections it made above. Include this file in your version control repository
so that Terraform can guarantee to make the same selections by default when
you run "terraform init" in the future.

Terraform has been successfully initialized!

You may now begin working with Terraform. Try running "terraform plan" to see
any changes that are required for your infrastructure. All Terraform commands
should now work.

If you ever set or change modules or backend configuration for Terraform,
rerun this command to reinitialize your working directory. If you forget, other
commands will detect it and remind you to do so if necessary.
pradeep@juniper apstra-terraform-3 %
Terraform downloads the apstra provider and installs it in a hidden subdirectory of your current working directory, named .terraform. The terraform init command prints out which version of the provider was installed. Terraform also creates a lock file named .terraform.lock.hcl which specifies the exact provider versions used, so that you can control when you want to update the providers used for your project.
Format and validate the configuration
We recommend using consistent formatting in all of your configuration files. The terraform fmt command automatically updates configurations in the current directory for readability and consistency.
Format your configuration. Terraform will print out the names of the files it modified, if any. If your configuration file was already formatted correctly, Terraform won’t return any file names.
pradeep@juniper apstra-terraform-3 % terraform fmt
main.tf
pradeep@juniper apstra-terraform-3 %
You can also make sure your configuration is syntactically valid and internally consistent by using the terraform validate command.
Validate your configuration. The example configuration provided above is valid, so Terraform will return a success message.
pradeep@juniper apstra-terraform-3 % terraform validate
Success! The configuration is valid.

pradeep@juniper apstra-terraform-3 %
Create infrastructure
Apply the configuration now with the terraform apply command.
pradeep@juniper apstra-terraform-3 % terraform apply

Terraform used the selected providers to generate the following execution plan. Resource actions are indicated with the following symbols:
  + create

Terraform will perform the following actions:

  # apstra_ipv4_pool.example will be created
  + resource "apstra_ipv4_pool" "example" {
      + id              = (known after apply)
      + name            = "RFC 5737 ranges"
      + status          = (known after apply)
      + subnets         = [
          + {
              + network         = "192.0.2.0/24"
              + status          = (known after apply)
              + total           = (known after apply)
              + used            = (known after apply)
              + used_percentage = (known after apply)
            },
          + {
              + network         = "198.51.100.0/24"
              + status          = (known after apply)
              + total           = (known after apply)
              + used            = (known after apply)
              + used_percentage = (known after apply)
            },
          + {
              + network         = "203.0.113.0/24"
              + status          = (known after apply)
              + total           = (known after apply)
              + used            = (known after apply)
              + used_percentage = (known after apply)
            },
        ]
      + total           = (known after apply)
      + used            = (known after apply)
      + used_percentage = (known after apply)
    }

Plan: 1 to add, 0 to change, 0 to destroy.

Changes to Outputs:
  + example_pool_size = (known after apply)

Do you want to perform these actions?
  Terraform will perform the actions described above.
  Only 'yes' will be accepted to approve.

  Enter a value: yes

apstra_ipv4_pool.example: Creating...
apstra_ipv4_pool.example: Creation complete after 2s [id=72f6ff51-9062-47ae-9b1d-05eb36835888]

Apply complete! Resources: 1 added, 0 changed, 0 destroyed.

Outputs:

example_pool_size = "pool 'RFC 5737 ranges' is sized for 768 addresses"
pradeep@juniper apstra-terraform-3 %
Before it applies any changes, Terraform prints out the execution plan which describes the actions Terraform will take in order to change your infrastructure to match the configuration.
The output format is similar to the diff format generated by tools such as Git. The output has a + next to apstra_ipv4_pool, meaning that Terraform will create this resource. Beneath that, it shows the attributes that will be set. When the value displayed is (known after apply), it means that the value will not be known until the resource is created
Terraform will now pause and wait for your approval before proceeding. If anything in the plan seems incorrect or dangerous, it is safe to abort here before Terraform modifies your infrastructure.
In this case the plan is acceptable, so type yes at the confirmation prompt to proceed.
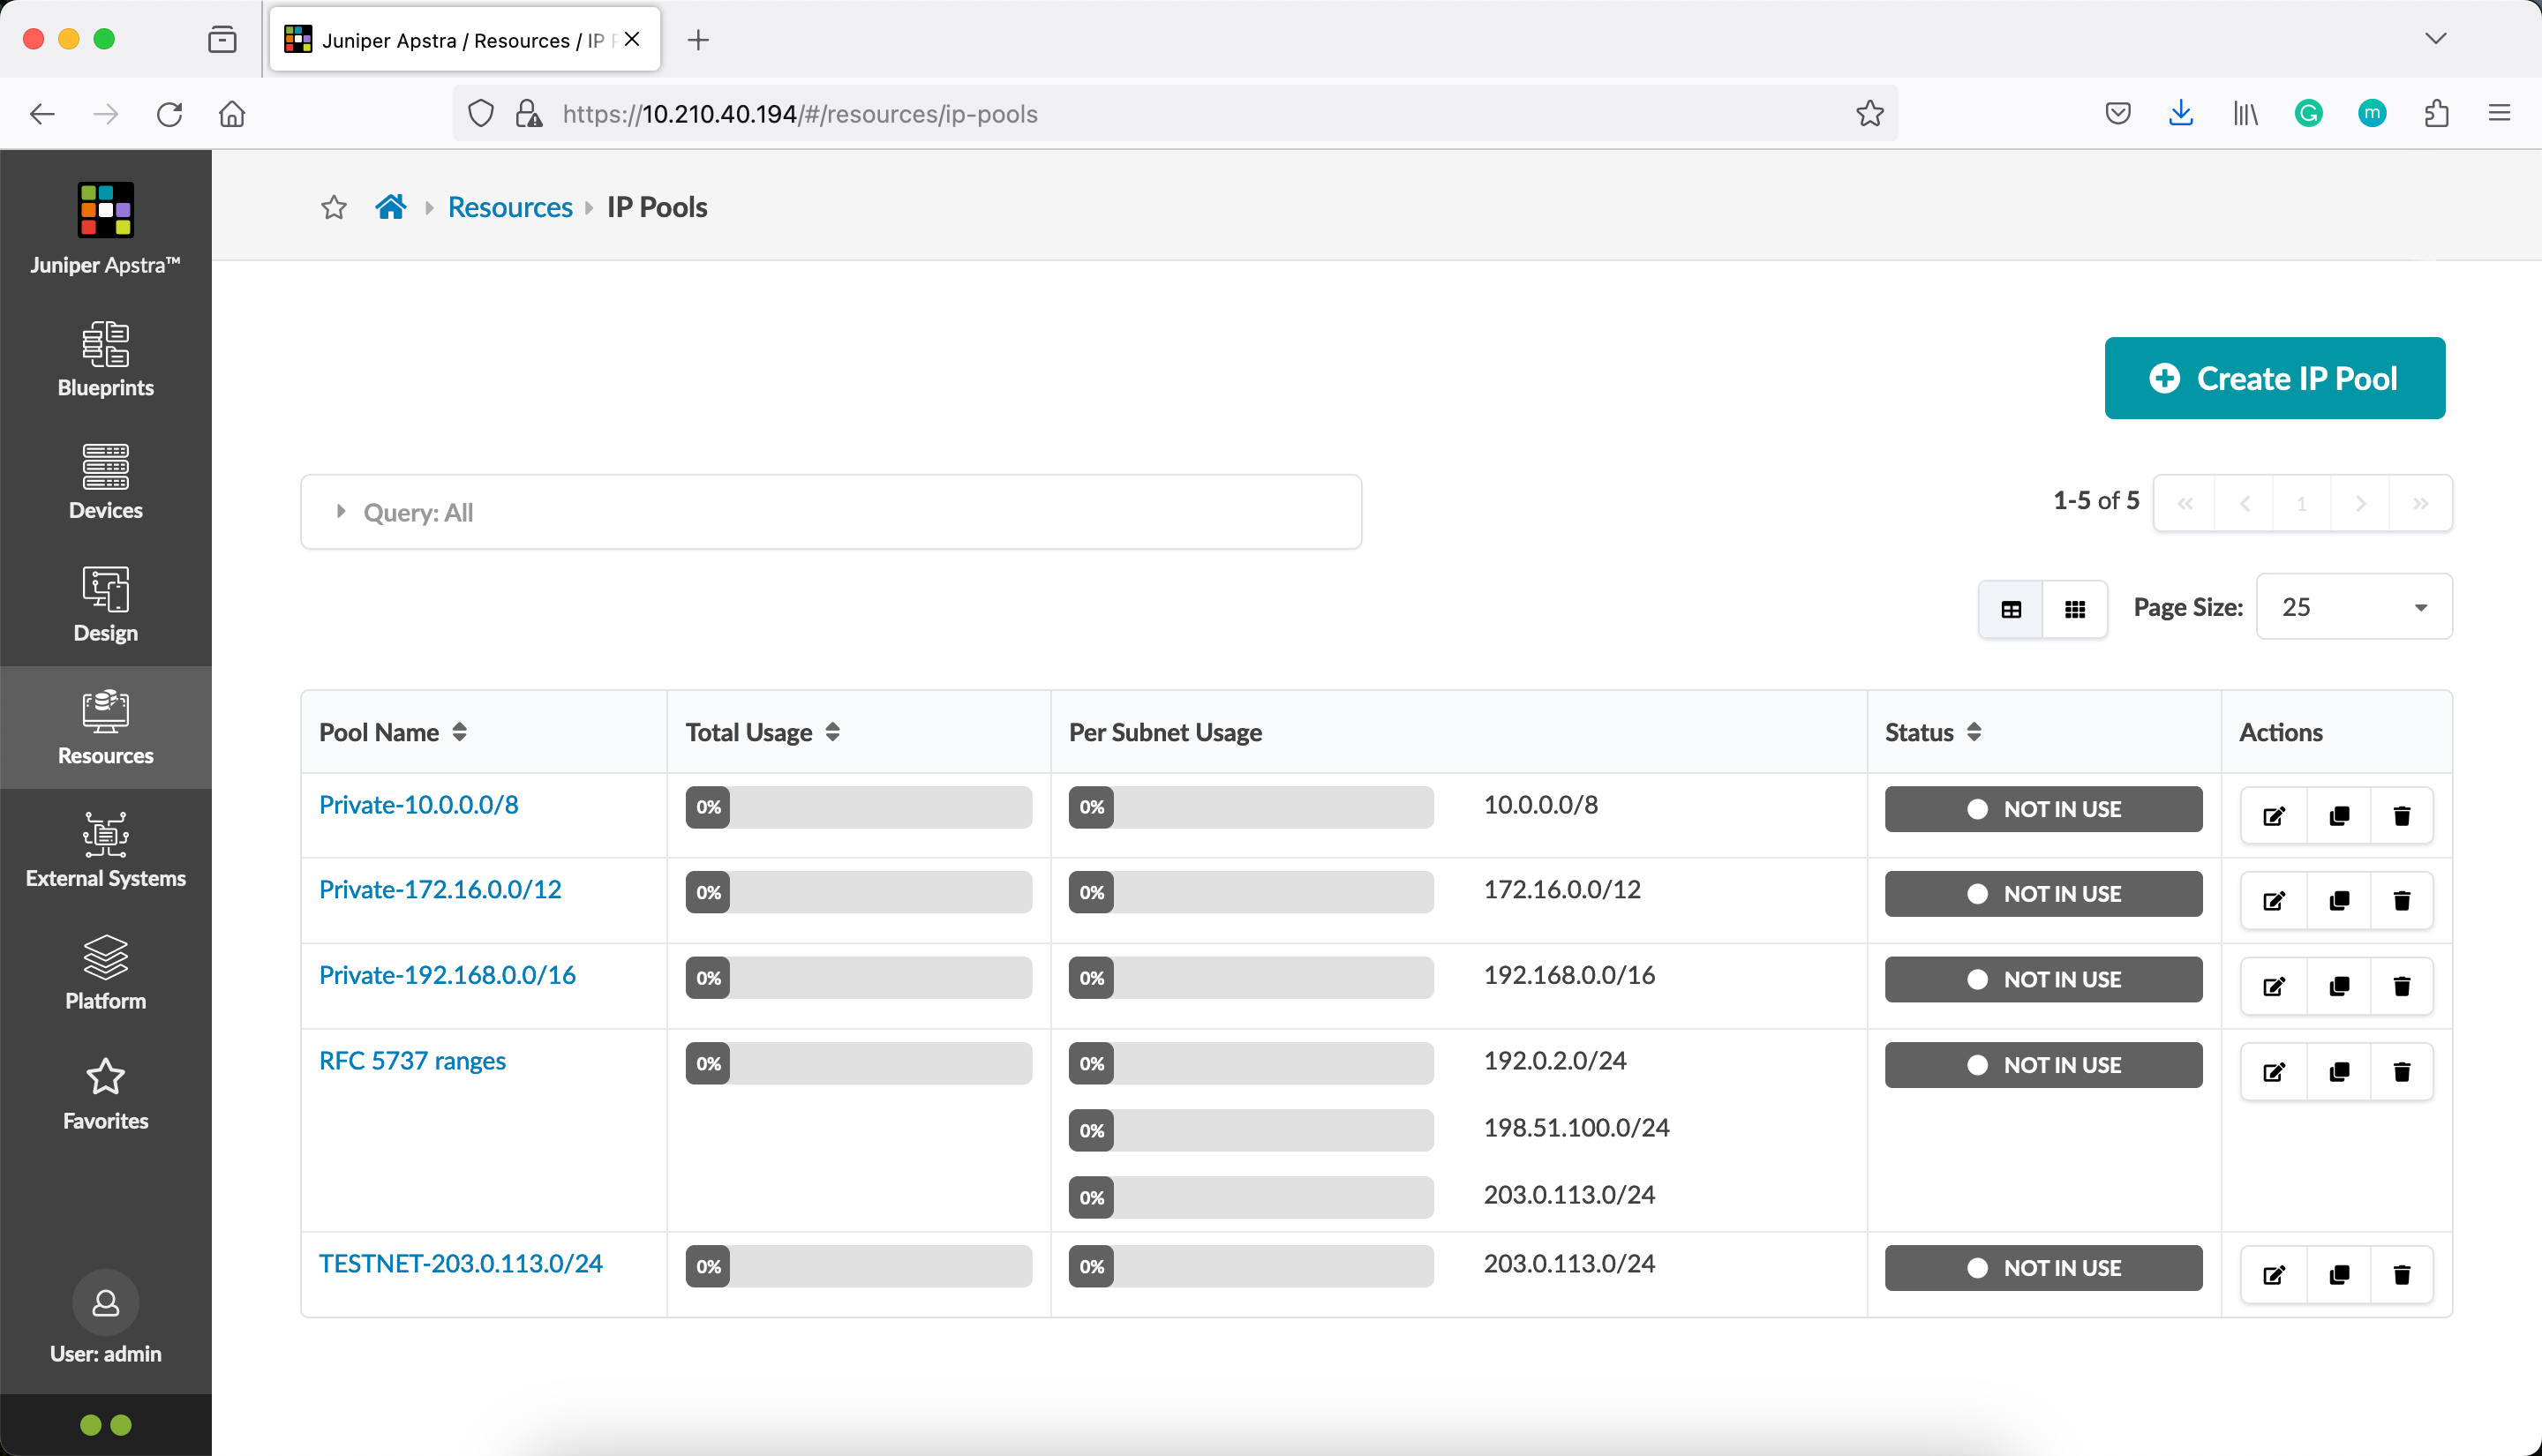
You have now created infrastructure using Terraform! Visit the Juniper Apstra Web UI and find your new IPv4 Pool. Named RFC 5737 ranges.
Inspect state
When you applied your configuration, Terraform wrote data into a file called terraform.tfstate. Terraform stores the IDs and properties of the resources it manages in this file, so that it can update or destroy those resources going forward.
The Terraform state file is the only way Terraform can track which resources it manages, and often contains sensitive information, so you must store your state file securely and restrict access to only trusted team members who need to manage your infrastructure.
Inspect the current state using terraform show.
pradeep@juniper apstra-terraform-3 % terraform show
# apstra_ipv4_pool.example:
resource "apstra_ipv4_pool" "example" {
    id              = "72f6ff51-9062-47ae-9b1d-05eb36835888"
    name            = "RFC 5737 ranges"
    status          = "not_in_use"
    subnets         = [
        {
            network         = "192.0.2.0/24"
            status          = "pool_element_available"
            total           = 256
            used            = 0
            used_percentage = 0
        },
        {
            network         = "198.51.100.0/24"
            status          = "pool_element_available"
            total           = 256
            used            = 0
            used_percentage = 0
        },
        {
            network         = "203.0.113.0/24"
            status          = "pool_element_available"
            total           = 256
            used            = 0
            used_percentage = 0
        },
    ]
    total           = 768
    used            = 0
    used_percentage = 0
}


Outputs:

example_pool_size = "pool 'RFC 5737 ranges' is sized for 768 addresses"
pradeep@juniper apstra-terraform-3 %
Terraform has a built-in command called terraform state for advanced state management. Use the list subcommand to list of the resources in your project’s state.
pradeep@juniper apstra-terraform-3 % terraform state list
apstra_ipv4_pool.example
pradeep@juniper apstra-terraform-3 %
In this post, you have created an IPv4 pool in Juniper Apstra using Terraform.


