Getting Started with Vagrant
Getting started with Vagrant
Vagrant is a tool for building and managing virtual machine environments in a single workflow. With an easy-to-use workflow and focus on automation, Vagrant lowers development environment setup time, increases production parity, and makes the “works on my machine” excuse a relic of the past.
Installing Vagrant
pradeep:~$brew install vagrant
Running `brew update --preinstall`...
==> Auto-updated Homebrew!
Updated 3 taps (hashicorp/tap, homebrew/core and homebrew/cask).
==> New Formulae
age-plugin-yubikey         minimap2                   sse2neon
arxiv_latex_cleaner        mkfontscale                virt-manager
libxfont2                  monika
==> Updated Formulae
Updated 132 formulae.
==> Updated Casks
Updated 72 casks.

==> Downloading https://releases.hashicorp.com/vagrant/2.2.19/vagrant_2.2.19_x86
curl: (28) Failed to connect to releases.hashicorp.com port 443: Operation timed out
Warning: Problem : timeout. Will retry in 1 seconds. 3 retries left.
######################################################################## 100.0%
==> Installing Cask vagrant
==> Running installer for vagrant; your password may be necessary.
Package installers may write to any location; options such as `--appdir` are ignored.
Password:
installer: Package name is Vagrant
installer: Upgrading at base path /
installer: The upgrade was successful.
🍺  vagrant was successfully installed!
pradeep:~$
Vagrant Help
pradeep:~$vagrant -h
Vagrant failed to initialize at a very early stage:

The plugins failed to initialize correctly. This may be due to manual
modifications made within the Vagrant home directory. Vagrant can
attempt to automatically correct this issue by running:

  vagrant plugin repair

If Vagrant was recently updated, this error may be due to incompatible
versions of dependencies. To fix this problem please remove and re-install
all plugins. Vagrant can attempt to do this automatically by running:

  vagrant plugin expunge --reinstall

Or you may want to try updating the installed plugins to their latest
versions:

  vagrant plugin update

Error message given during initialization: Unable to resolve dependency: user requested 'vagrant-host-shell (= 0.0.4)'
pradeep:~$
Vagrant Plugin Update
pradeep:~$vagrant plugin update
Updating installed plugins...
Fetching vagrant-host-shell-0.0.4.gem
Fetching vagrant-junos-0.2.1.gem
Fetching vagrant-vyos-1.1.10.gem
Updated 'vagrant-vyos' to version '1.1.10'!
pradeep:~$
pradeep:~$vagrant -h
Usage: vagrant [options] <command> [<args>]

    -h, --help                       Print this help.

Common commands:
     autocomplete    manages autocomplete installation on host
     box             manages boxes: installation, removal, etc.
     cloud           manages everything related to Vagrant Cloud
     destroy         stops and deletes all traces of the vagrant machine
     global-status   outputs status Vagrant environments for this user
     halt            stops the vagrant machine
     help            shows the help for a subcommand
     init            initializes a new Vagrant environment by creating a Vagrantfile
     login
     package         packages a running vagrant environment into a box
     plugin          manages plugins: install, uninstall, update, etc.
     port            displays information about guest port mappings
     powershell      connects to machine via powershell remoting
     provision       provisions the vagrant machine
     push            deploys code in this environment to a configured destination
     rdp             connects to machine via RDP
     reload          restarts vagrant machine, loads new Vagrantfile configuration
     resume          resume a suspended vagrant machine
     snapshot        manages snapshots: saving, restoring, etc.
     ssh             connects to machine via SSH
     ssh-config      outputs OpenSSH valid configuration to connect to the machine
     status          outputs status of the vagrant machine
     suspend         suspends the machine
     up              starts and provisions the vagrant environment
     upload          upload to machine via communicator
     validate        validates the Vagrantfile
     version         prints current and latest Vagrant version
     winrm           executes commands on a machine via WinRM
     winrm-config    outputs WinRM configuration to connect to the machine

For help on any individual command run `vagrant COMMAND -h`

Additional subcommands are available, but are either more advanced
or not commonly used. To see all subcommands, run the command
`vagrant list-commands`.
        --[no-]color                 Enable or disable color output
        --machine-readable           Enable machine readable output
    -v, --version                    Display Vagrant version
        --debug                      Enable debug output
        --timestamp                  Enable timestamps on log output
        --debug-timestamp            Enable debug output with timestamps
        --no-tty                     Enable non-interactive output

pradeep:~$
Vagrant Init
pradeep:~$vagrant init
A `Vagrantfile` has been placed in this directory. You are now
ready to `vagrant up` your first virtual environment! Please read
the comments in the Vagrantfile as well as documentation on
`vagrantup.com` for more information on using Vagrant.
pradeep:~$
Vagrantfile
pradeep:~$cat Vagrantfile
# -*- mode: ruby -*-
# vi: set ft=ruby :

# All Vagrant configuration is done below. The "2" in Vagrant.configure
# configures the configuration version (we support older styles for
# backwards compatibility). Please don't change it unless you know what
# you're doing.
Vagrant.configure("2") do |config|
  # The most common configuration options are documented and commented below.
  # For a complete reference, please see the online documentation at
  # https://docs.vagrantup.com.

  # Every Vagrant development environment requires a box. You can search for
  # boxes at https://vagrantcloud.com/search.
  config.vm.box = "base"

  # Disable automatic box update checking. If you disable this, then
  # boxes will only be checked for updates when the user runs
  # `vagrant box outdated`. This is not recommended.
  # config.vm.box_check_update = false

  # Create a forwarded port mapping which allows access to a specific port
  # within the machine from a port on the host machine. In the example below,
  # accessing "localhost:8080" will access port 80 on the guest machine.
  # NOTE: This will enable public access to the opened port
  # config.vm.network "forwarded_port", guest: 80, host: 8080

  # Create a forwarded port mapping which allows access to a specific port
  # within the machine from a port on the host machine and only allow access
  # via 127.0.0.1 to disable public access
  # config.vm.network "forwarded_port", guest: 80, host: 8080, host_ip: "127.0.0.1"

  # Create a private network, which allows host-only access to the machine
  # using a specific IP.
  # config.vm.network "private_network", ip: "192.168.33.10"

  # Create a public network, which generally matched to bridged network.
  # Bridged networks make the machine appear as another physical device on
  # your network.
  # config.vm.network "public_network"

  # Share an additional folder to the guest VM. The first argument is
  # the path on the host to the actual folder. The second argument is
  # the path on the guest to mount the folder. And the optional third
  # argument is a set of non-required options.
  # config.vm.synced_folder "../data", "/vagrant_data"

  # Provider-specific configuration so you can fine-tune various
  # backing providers for Vagrant. These expose provider-specific options.
  # Example for VirtualBox:
  #
  # config.vm.provider "virtualbox" do |vb|
  #   # Display the VirtualBox GUI when booting the machine
  #   vb.gui = true
  #
  #   # Customize the amount of memory on the VM:
  #   vb.memory = "1024"
  # end
  #
  # View the documentation for the provider you are using for more
  # information on available options.

  # Enable provisioning with a shell script. Additional provisioners such as
  # Ansible, Chef, Docker, Puppet and Salt are also available. Please see the
  # documentation for more information about their specific syntax and use.
  # config.vm.provision "shell", inline: <<-SHELL
  #   apt-get update
  #   apt-get install -y apache2
  # SHELL
end
pradeep:~$
Vagrant Up
pradeep:~$vagrant up
No usable default provider could be found for your system.

Vagrant relies on interactions with 3rd party systems, known as
"providers", to provide Vagrant with resources to run development
environments. Examples are VirtualBox, VMware, Hyper-V.

The easiest solution to this message is to install VirtualBox, which
is available for free on all major platforms.

If you believe you already have a provider available, make sure it
is properly installed and configured. You can see more details about
why a particular provider isn't working by forcing usage with
`vagrant up --provider=PROVIDER`, which should give you a more specific
error message for that particular provider.
pradeep:~$
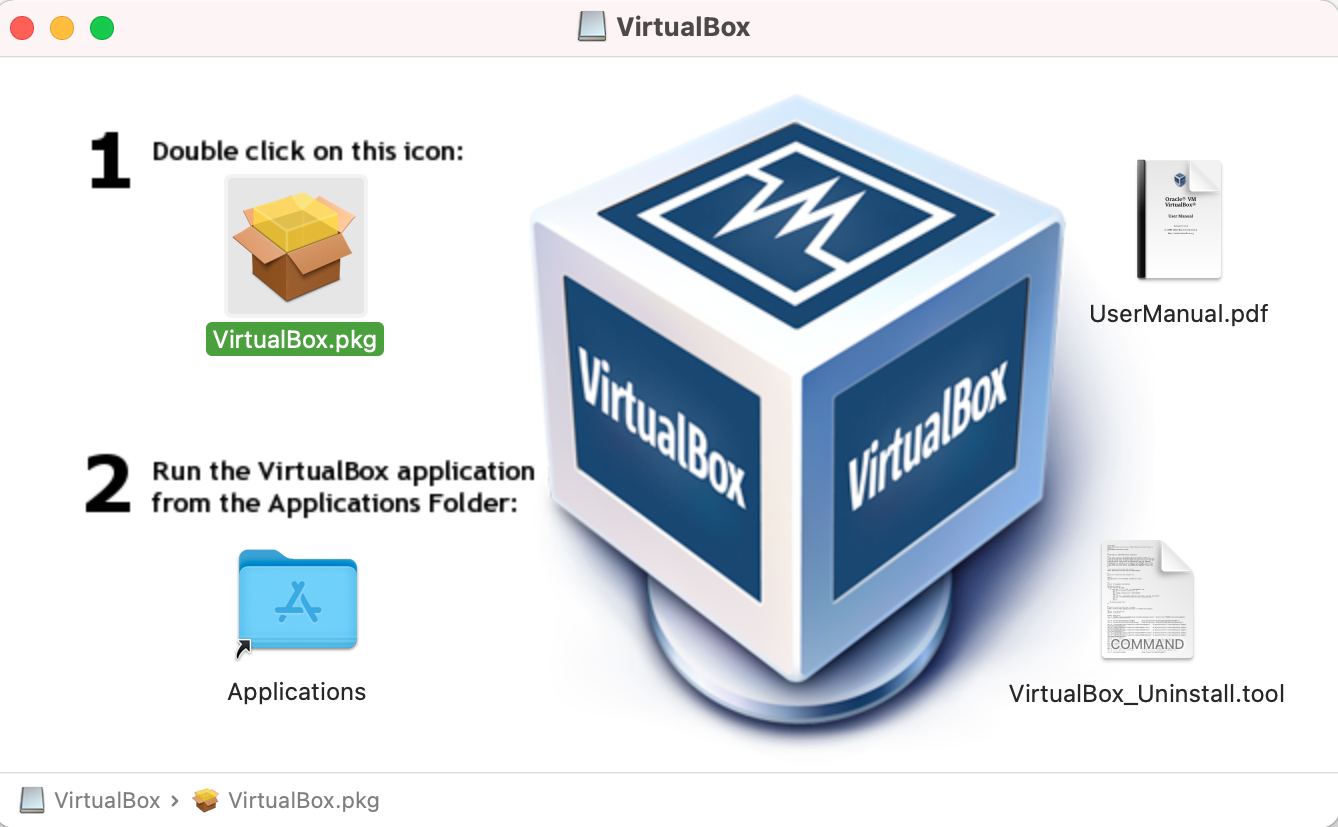
Let us install Virtual Box from Oracle.

pradeep:~$vagrant up
Bringing machine 'default' up with 'virtualbox' provider...
==> default: Box 'base' could not be found. Attempting to find and install...
    default: Box Provider: virtualbox
    default: Box Version: >= 0
==> default: Box file was not detected as metadata. Adding it directly...
==> default: Adding box 'base' (v0) for provider: virtualbox
    default: Downloading: base
An error occurred while downloading the remote file. The error
message, if any, is reproduced below. Please fix this error and try
again.

Couldn't open file /Users/pradeep/learn-vagrant/base
pradeep:~$
Vagrant Box List
Earlier, I have downloaded few boxes, like Juniper FireFlyPerimeter (FFP/or early version of vSRX) and Cumulus VX.
pradeep:~$vagrant box list
CumulusCommunity/cumulus-vx          (virtualbox, 4.2.1)
hashicorp/bionic64                   (virtualbox, 1.0.282)
juniper/ffp-12.1X47-D15.4-packetmode (virtualbox, 0.5.0)
pradeep:~$
Let us use hashicorp/bionic64 box
pradeep:~$vagrant init hashicorp/bionic64
`Vagrantfile` already exists in this directory. Remove it before
running `vagrant init`.
pradeep:~$rm Vagrantfile
``

```sh
pradeep:~$vagrant init hashicorp/bionic64
A `Vagrantfile` has been placed in this directory. You are now
ready to `vagrant up` your first virtual environment! Please read
the comments in the Vagrantfile as well as documentation on
`vagrantup.com` for more information on using Vagrant.
pradeep:~$
pradeep:~$cat Vagrantfile
# -*- mode: ruby -*-
# vi: set ft=ruby :

# All Vagrant configuration is done below. The "2" in Vagrant.configure
# configures the configuration version (we support older styles for
# backwards compatibility). Please don't change it unless you know what
# you're doing.
Vagrant.configure("2") do |config|
  # The most common configuration options are documented and commented below.
  # For a complete reference, please see the online documentation at
  # https://docs.vagrantup.com.

  # Every Vagrant development environment requires a box. You can search for
  # boxes at https://vagrantcloud.com/search.
  config.vm.box = "hashicorp/bionic64"

  # Disable automatic box update checking. If you disable this, then
  # boxes will only be checked for updates when the user runs
  # `vagrant box outdated`. This is not recommended.
  # config.vm.box_check_update = false

  # Create a forwarded port mapping which allows access to a specific port
  # within the machine from a port on the host machine. In the example below,
  # accessing "localhost:8080" will access port 80 on the guest machine.
  # NOTE: This will enable public access to the opened port
  # config.vm.network "forwarded_port", guest: 80, host: 8080

  # Create a forwarded port mapping which allows access to a specific port
  # within the machine from a port on the host machine and only allow access
  # via 127.0.0.1 to disable public access
  # config.vm.network "forwarded_port", guest: 80, host: 8080, host_ip: "127.0.0.1"

  # Create a private network, which allows host-only access to the machine
  # using a specific IP.
  # config.vm.network "private_network", ip: "192.168.33.10"

  # Create a public network, which generally matched to bridged network.
  # Bridged networks make the machine appear as another physical device on
  # your network.
  # config.vm.network "public_network"

  # Share an additional folder to the guest VM. The first argument is
  # the path on the host to the actual folder. The second argument is
  # the path on the guest to mount the folder. And the optional third
  # argument is a set of non-required options.
  # config.vm.synced_folder "../data", "/vagrant_data"

  # Provider-specific configuration so you can fine-tune various
  # backing providers for Vagrant. These expose provider-specific options.
  # Example for VirtualBox:
  #
  # config.vm.provider "virtualbox" do |vb|
  #   # Display the VirtualBox GUI when booting the machine
  #   vb.gui = true
  #
  #   # Customize the amount of memory on the VM:
  #   vb.memory = "1024"
  # end
  #
  # View the documentation for the provider you are using for more
  # information on available options.

  # Enable provisioning with a shell script. Additional provisioners such as
  # Ansible, Chef, Docker, Puppet and Salt are also available. Please see the
  # documentation for more information about their specific syntax and use.
  # config.vm.provision "shell", inline: <<-SHELL
  #   apt-get update
  #   apt-get install -y apache2
  # SHELL
end
pradeep:~$
pradeep:~$vagrant up
Bringing machine 'default' up with 'virtualbox' provider...
==> default: Importing base box 'hashicorp/bionic64'...
==> default: Matching MAC address for NAT networking...
==> default: Checking if box 'hashicorp/bionic64' version '1.0.282' is up to date...
==> default: Setting the name of the VM: learn-vagrant_default_1651724719949_42985
==> default: Clearing any previously set network interfaces...
==> default: Preparing network interfaces based on configuration...
    default: Adapter 1: nat
==> default: Forwarding ports...
    default: 22 (guest) => 2222 (host) (adapter 1)
==> default: Booting VM...
There was an error while executing `VBoxManage`, a CLI used by Vagrant
for controlling VirtualBox. The command and stderr is shown below.

Command: ["startvm", "f300f005-806d-4160-ab6d-47d19284e568", "--type", "headless"]

Stderr: VBoxManage: error: The virtual machine 'learn-vagrant_default_1651724719949_42985' has terminated unexpectedly during startup with exit code 1 (0x1)
VBoxManage: error: Details: code NS_ERROR_FAILURE (0x80004005), component MachineWrap, interface IMachine

pradeep:~$
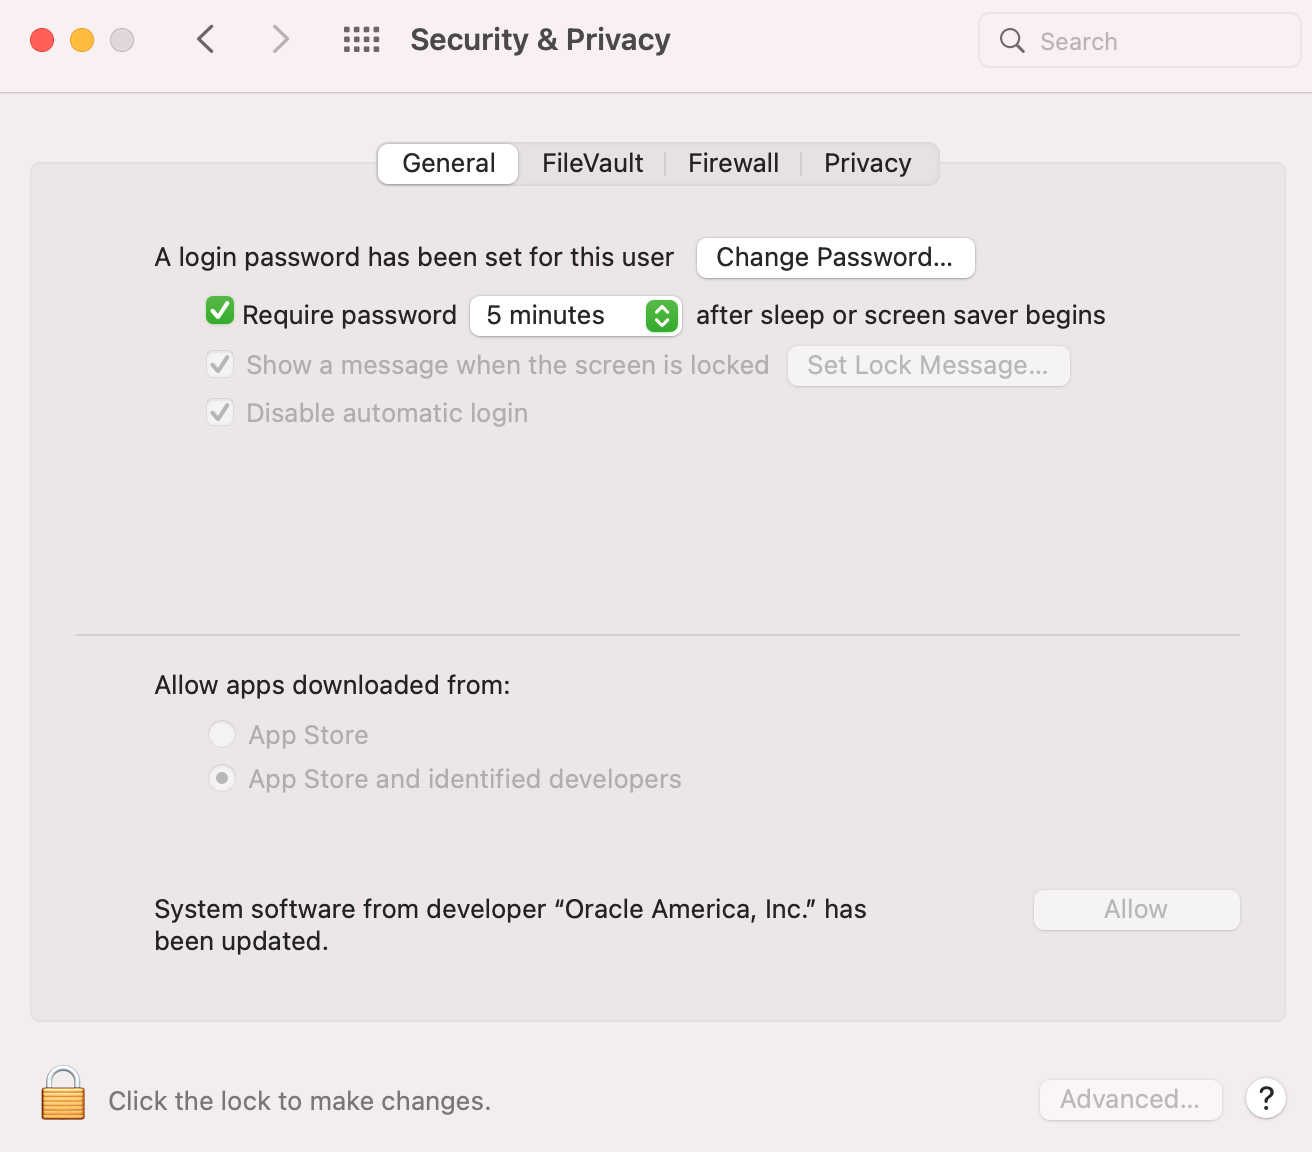
To get rid of this error, let us allow the system extension.

pradeep:~$vagrant up
Bringing machine 'default' up with 'virtualbox' provider...
==> default: Checking if box 'hashicorp/bionic64' version '1.0.282' is up to date...
==> default: Clearing any previously set forwarded ports...
==> default: Clearing any previously set network interfaces...
==> default: Preparing network interfaces based on configuration...
    default: Adapter 1: nat
==> default: Forwarding ports...
    default: 22 (guest) => 2222 (host) (adapter 1)
==> default: Booting VM...
==> default: Waiting for machine to boot. This may take a few minutes...
    default: SSH address: 127.0.0.1:2222
    default: SSH username: vagrant
    default: SSH auth method: private key
    default: Warning: Connection reset. Retrying...
    default:
    default: Vagrant insecure key detected. Vagrant will automatically replace
    default: this with a newly generated keypair for better security.
    default:
    default: Inserting generated public key within guest...
    default: Removing insecure key from the guest if it's present...
    default: Key inserted! Disconnecting and reconnecting using new SSH key...
==> default: Machine booted and ready!
==> default: Checking for guest additions in VM...
    default: The guest additions on this VM do not match the installed version of
    default: VirtualBox! In most cases this is fine, but in rare cases it can
    default: prevent things such as shared folders from working properly. If you see
    default: shared folder errors, please make sure the guest additions within the
    default: virtual machine match the version of VirtualBox you have installed on
    default: your host and reload your VM.
    default:
    default: Guest Additions Version: 6.0.10
    default: VirtualBox Version: 6.1
==> default: Mounting shared folders...
    default: /vagrant => /Users/pradeep/learn-vagrant
pradeep:~$
Vagrant SSH
pradeep:~$vagrant ssh
Welcome to Ubuntu 18.04.3 LTS (GNU/Linux 4.15.0-58-generic x86_64)

 * Documentation:  https://help.ubuntu.com
 * Management:     https://landscape.canonical.com
 * Support:        https://ubuntu.com/advantage

  System information as of Thu May  5 04:33:57 UTC 2022

  System load:  0.08              Processes:           92
  Usage of /:   2.5% of 61.80GB   Users logged in:     0
  Memory usage: 11%               IP address for eth0: 10.0.2.15
  Swap usage:   0%

 * Super-optimized for small spaces - read how we shrank the memory
   footprint of MicroK8s to make it the smallest full K8s around.

   https://ubuntu.com/blog/microk8s-memory-optimisation

0 packages can be updated.
0 updates are security updates.


vagrant@vagrant:~$
Inside the VM
vagrant@vagrant:~$ uname -a
Linux vagrant 4.15.0-58-generic #64-Ubuntu SMP Tue Aug 6 11:12:41 UTC 2019 x86_64 x86_64 x86_64 GNU/Linux
vagrant@vagrant:~$ cat /etc/os-release
NAME="Ubuntu"
VERSION="18.04.3 LTS (Bionic Beaver)"
ID=ubuntu
ID_LIKE=debian
PRETTY_NAME="Ubuntu 18.04.3 LTS"
VERSION_ID="18.04"
HOME_URL="https://www.ubuntu.com/"
SUPPORT_URL="https://help.ubuntu.com/"
BUG_REPORT_URL="https://bugs.launchpad.net/ubuntu/"
PRIVACY_POLICY_URL="https://www.ubuntu.com/legal/terms-and-policies/privacy-policy"
VERSION_CODENAME=bionic
UBUNTU_CODENAME=bionic
vagrant@vagrant:~$
vagrant@vagrant:~$ ip a
1: lo: <LOOPBACK,UP,LOWER_UP> mtu 65536 qdisc noqueue state UNKNOWN group default qlen 1000
    link/loopback 00:00:00:00:00:00 brd 00:00:00:00:00:00
    inet 127.0.0.1/8 scope host lo
       valid_lft forever preferred_lft forever
    inet6 ::1/128 scope host
       valid_lft forever preferred_lft forever
2: eth0: <BROADCAST,MULTICAST,UP,LOWER_UP> mtu 1500 qdisc fq_codel state UP group default qlen 1000
    link/ether 08:00:27:bb:14:75 brd ff:ff:ff:ff:ff:ff
    inet 10.0.2.15/24 brd 10.0.2.255 scope global dynamic eth0
       valid_lft 86180sec preferred_lft 86180sec
    inet6 fe80::a00:27ff:febb:1475/64 scope link
       valid_lft forever preferred_lft forever
vagrant@vagrant:~$
vagrant@vagrant:~$ exit
logout
Connection to 127.0.0.1 closed.
pradeep:~$
Vagrant Status
pradeep:~$vagrant status
Current machine states:

default                   running (virtualbox)

The VM is running. To stop this VM, you can run `vagrant halt` to
shut it down forcefully, or you can run `vagrant suspend` to simply
suspend the virtual machine. In either case, to restart it again,
simply run `vagrant up`.
pradeep:~$
Vagrant Halt
pradeep:~$vagrant halt
==> default: Attempting graceful shutdown of VM...
pradeep:~$vagrant status
Current machine states:

default                   poweroff (virtualbox)

The VM is powered off. To restart the VM, simply run `vagrant up`
pradeep:~$
Vagrant Destroy
pradeep:~$vagrant destroy
    default: Are you sure you want to destroy the 'default' VM? [y/N] y
==> default: Destroying VM and associated drives...
pradeep:~$
pradeep:~$ls
Vagrantfile
pradeep:~$vagrant status
Current machine states:

default                   not created (virtualbox)

The environment has not yet been created. Run `vagrant up` to
create the environment. If a machine is not created, only the
default provider will be shown. So if a provider is not listed,
then the machine is not created for that environment.
pradeep:~$


